LACP configuration
By default, we connect all our dedicated servers using LAG (Link Aggregation Group).
What is LAG? LAG is a networking technique that combines multiple physical network links into a single logical link. This aggregated link increases bandwidth, provides redundancy, and enhances reliability. This will require a corresponding configuration in the server’s OS. Most of the modern operating systems support LACP (Link Aggregation Control Protocol) out-of-the-box, and will require a little configuration.
Let’s take a look at the most common examples:
Ubuntu / Debian 12.x+
root@server:~# cat /etc/netplan/00-installer-config.yaml
network:
  version: 2
  renderer: networkd
  ethernets:
    eno1:   #First physical interface
      dhcp4: no   #DHCP disabled
    eno2:   #Second physical interface
      dhcp4: no   #DHCP disabled
    eno3:
      dhcp4: no
      optional: true
    eno4:
      dhcp4: no
      optional: true

  bonds:   #New bonds group
    bond0:   #New bond interface
      interfaces: [eno1, eno2]   #List of slave interfaces
      addresses: [111.222.111.222/24]   #Assigning IP to the new bond0 interface
      nameservers:
        addresses: [1.1.1.1]
      routes:
        - to: default
          via: 111.222.111.1   #Default gateway
      parameters:
        mode: 802.3ad   #Extremely important, bonding protocol
        transmit-hash-policy: layer3+4
        mii-monitor-interval: 100
How to apply new config:
netplan try   #Will check the config for errors
netplan apply   #Will apply the new config on the go, without rebooting the server
Debian <12 (10, 11, etc.)
In order to configure LACP in such case, you’ll need to install ifenslave package. But since you don’t have a working Internet connection yet, you should use some workarounds listed below.
Online installation. We can disaggregate interfaces on our side, so you’ll be able to set up connection througn one of your physical ports.
Offline installation. Prepare an ISO file containing a .deb package of ifenslave tool.
Online installation
Contact our support team to dissagregate your current connection.
Once everything is done, configure the networking on your physical port:
root@server:~# sudo nano /etc/network/interfaces
Change the configuration as the following:
auto eth1
iface eth1 inet static
    address 111.222.111.222
    netmask 255.255.255.0
    gateway 111.222.111.1
    dns-nameservers 1.1.1.1.1 1.0.0.1
Save the new configuration:
sudo ifdown eth1 && sudo ifup eth1
Or reboot using
sudo reboot
Offline installation
1. Download the ifenslave Package
On a Debian/Ubuntu machine with internet:
mkdir -p ~/offline-ifenslave
cd ~/offline-ifenslave
apt download ifenslave
This downloads a .deb file, e.g., ifenslave_2.12_all.deb.
2. Create an ISO from the .deb File
Install the ISO creation tool (if necessary):
sudo apt install genisoimage
Then create the ISO:
mkisofs -o ifenslave.iso -V "IFENSLAVE" -J -r .
This generates an ISO image containing the package.
3. Map the ISO via iDRAC
Open the iDRAC web interface.
Launch the Virtual Console.
In the console, go to:
Virtual Media > Map CD/DVD.Select and map
ifenslave.iso.
It should now appear as a CD/DVD drive on the server (e.g., /dev/sr0).
4: Mount the ISO on the Target Debian Server
From the console or SSH session:
sudo mkdir -p /mnt/ifenslave
sudo mount /dev/sr0 /mnt/ifenslave
Verify contents:
ls /mnt/ifenslave
5. Install the Package
Run:
sudo dpkg -i /mnt/ifenslave/ifenslave_*.deb
If dependencies are missing:
sudo apt --fix-broken install
(Note: --fix-broken only works if dependencies are available later.)
6. Optional Cleanup
After installation:
sudo umount /mnt/ifenslave
Finally, once the ifenslave is installed, we can confgure LACP. Don’t forget to ask support team to bring LAG back for your server if you decided to use online installation.
root@server:~# sudo nano /etc/network/interfaces
Change the configuration to the following:
auto bond0
iface bond0 inet static
    address 111.222.111.222
    netmask 255.255.255.0
    gateway 111.222.111.1
    dns-nameservers 1.1.1.1 1.0.0.1
    bond-slaves eth0 eth1
    bond-mode 802.3ad
    bond-miimon 100
    bond-downdelay 200
    bond-updelay 200
    bond-lacp-rate fast
    bond-xmit-hash-policy layer3+4

# Physical interfaces
auto eth0
iface eth0 inet manual
    bond-master bond0

auto eth1
iface eth1 inet manual
    bond-master bond0
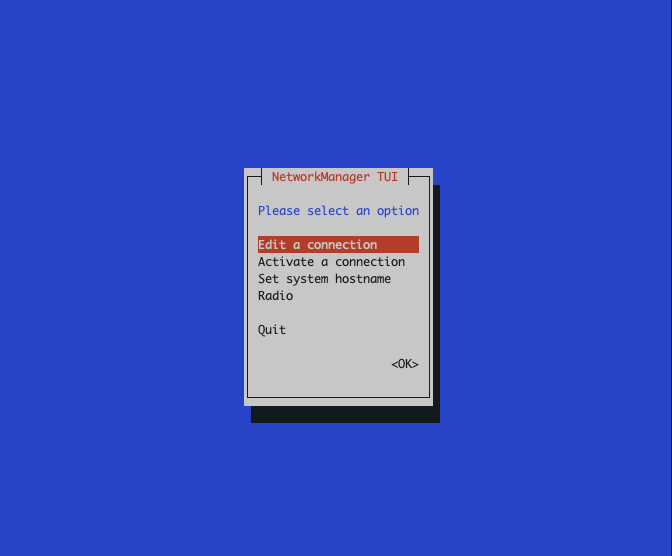
RHEL-based distributions using nmtui (AlmaLinux, CentOS, Rocky Linux, Fedora, etc.)
RHEL-based distros are coming with a preinstalled tool called nmtui, which is a pseudo-interface utility for network configuration.
The logic remain the same: you have to disable DHCP on the physical interface, create a new bonding interface, add physical interfaces as slaves and assign IP to the bonding interface. Please note that physical interface names can be different on your server.
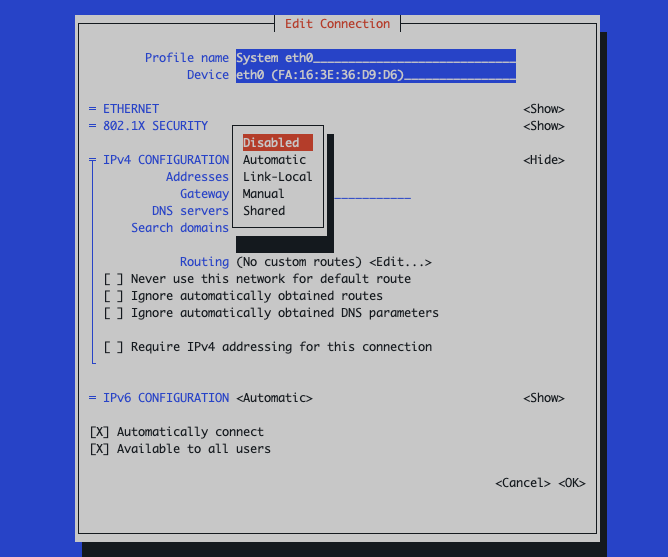
Disable DHCP on physical interface eth0/eth1:
Edit a connection -> eth0 -> IPv4 Configuration -> Disabled
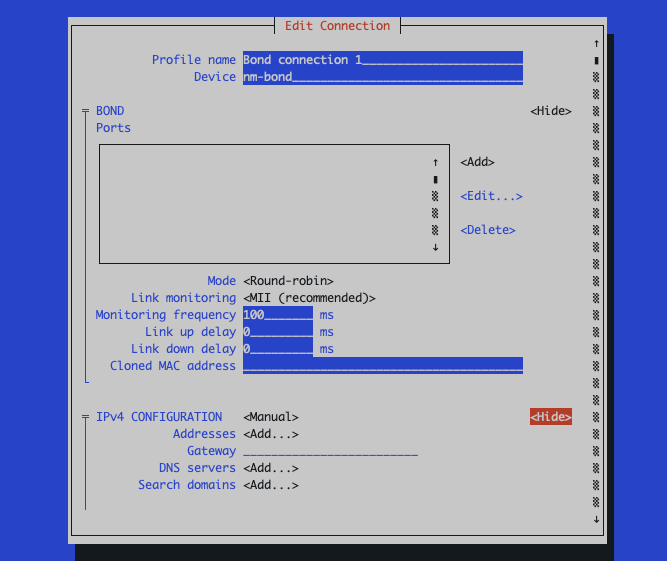
Create bonding interface:
Edit a connection -> Add -> Bond
Ports -> Add -> Ethernet -> Device: eth0
Ports -> Add -> Ethernet -> Device: eth1
Mode -> 802.3ad
IPv4 Configuration -> Manual -> Show: input your networking config
Make sure that the bonding connection is active:
Activate a connection -> bond0: should be marked with an asterisk [*]
Using nmcli
# 1. Create the bond interface with LACP mode
nmcli con add type bond con-name bond0 ifname bond0 mode 802.3ad

# 2. Set bonding options (optional but recommended)
nmcli con modify bond0 bond.options "mode=802.3ad,miimon=100,xmit_hash_policy=layer2+3"

# 3. Add slave interface eth1 to bond0
nmcli con add type ethernet con-name slave1 ifname eth1 master bond0

# 4. Add slave interface eth2 to bond0
nmcli con add type ethernet con-name slave2 ifname eth2 master bond0

# 5. Assign IP address and gateway to bond0
nmcli con modify bond0 ipv4.addresses 111.222.111.222/24
nmcli con modify bond0 ipv4.gateway 111.222.111.1
nmcli con modify bond0 ipv4.method manual
nmcli con modify bond0 ipv6.method ignore

# 6. Bring up the bond and slave connections
nmcli con up bond0
nmcli con up slave1
nmcli con up slave2
Mikrotik / RouterOS
Via CLI:
/interface bonding
add comment=bonding1 mode=802.3ad name=etherX-Y_bonding slaves=etherX,etherY

/ip address
add address=111.222.111.222/24 interface=etherX-Y_bonding
Enter your physical interfaces in slaves variable like this: slaves=ether0,ether1.
Using WinBox
Login to Winbox
Open Winbox and connect to your MikroTik device.
Go to Interfaces
Click on Interfaces on the left menu.
Add a Bonding Interface
- Click the “+” button and select Bonding.
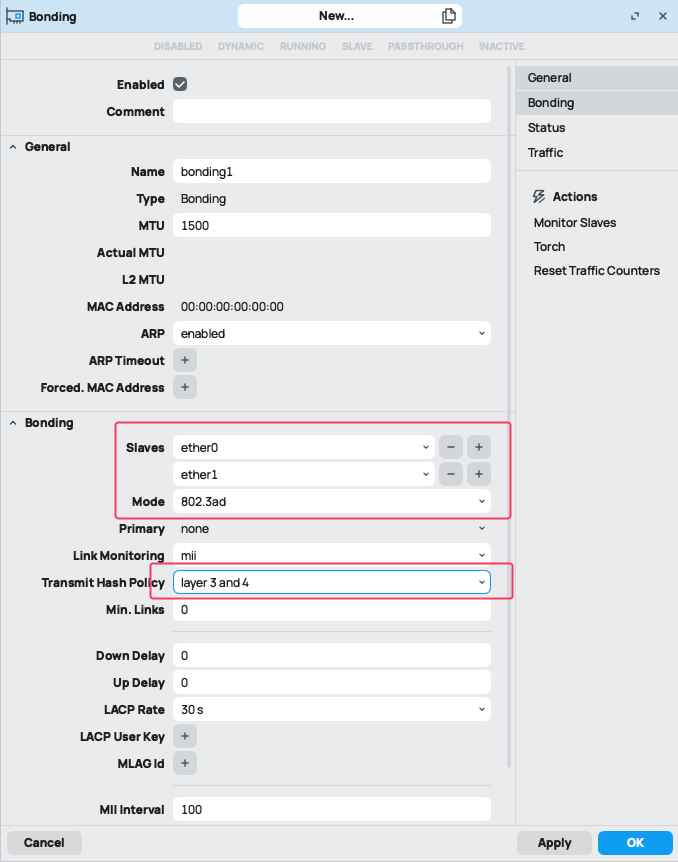
Set:
Name: bonding1 (or as preferred)
Mode: 802.3ad
Slaves: Select ether1, ether2 (or others you want to bond)
LACP Rate: 30secs (default) or set to 1sec for faster convergence
Transmit Hash Policy: layer3+4
Apply and OK
Click Apply, then OK.
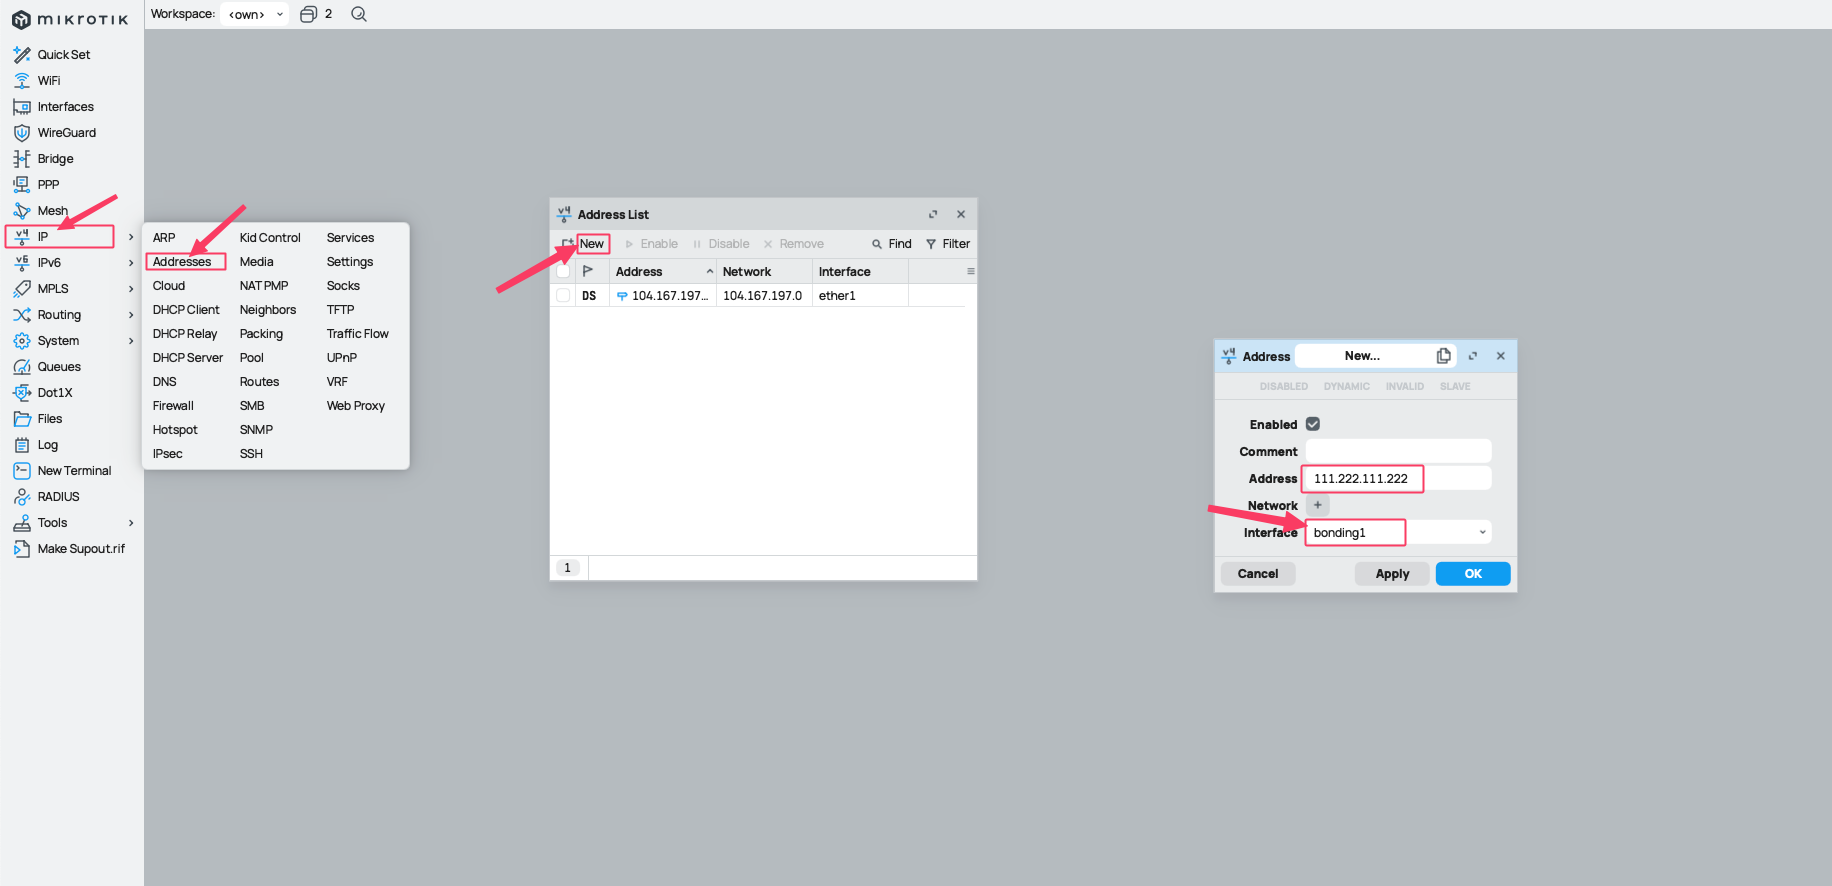
Assign IP Address (optional)
Go to IP > Addresses.
Click “+”, set:
Address: e.g., 111.222.111.222/24
Interface: bonding1
Set Default Gateway (optional)
Go to IP > Routes
Add a new route:
Gateway: e.g., 111.222.111.1
Leave destination as 0.0.0.0/0
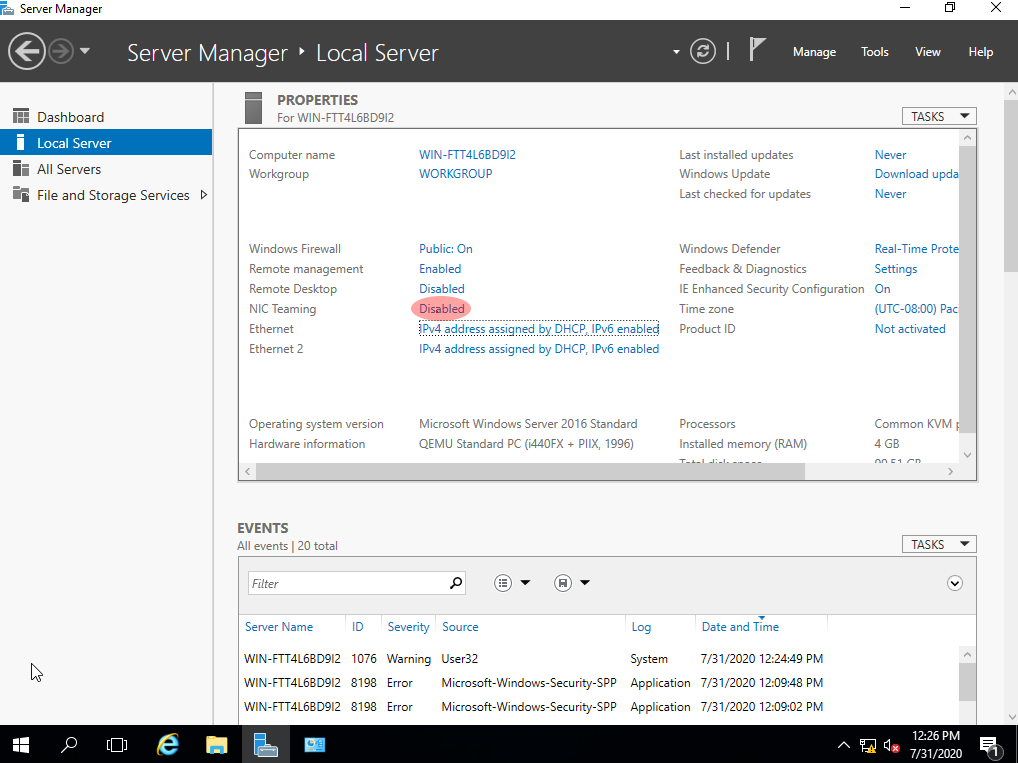
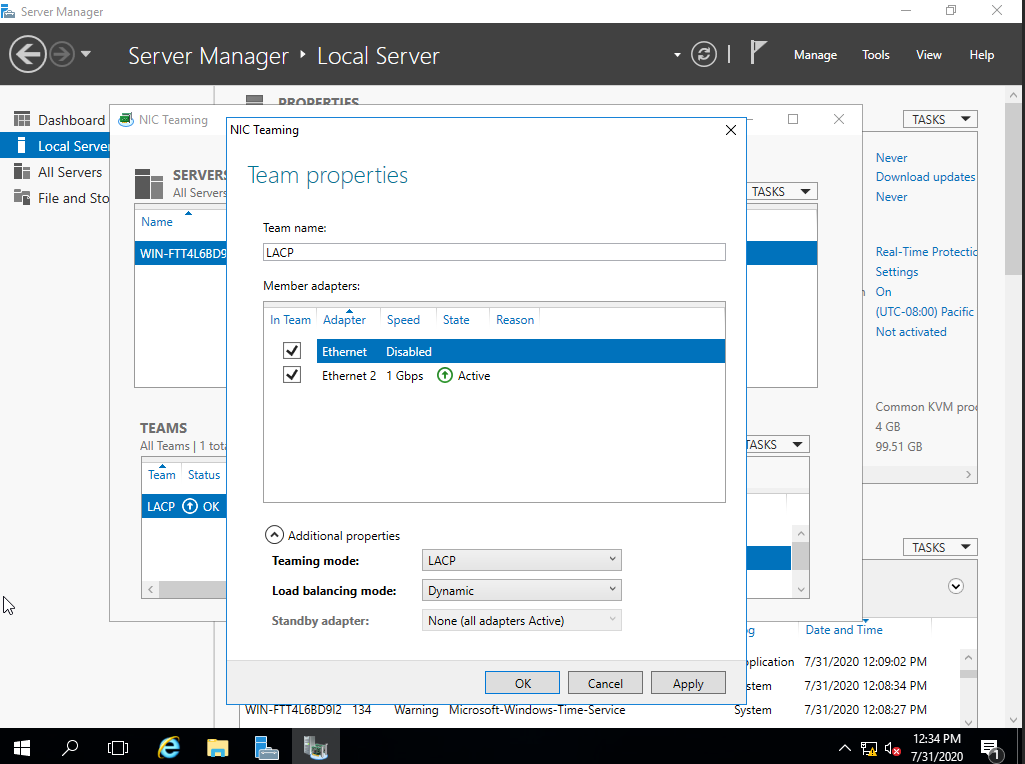
Windows Server
In the Start menu, find Server Manager. Go to the Local server menu, select NIC Teaming:
In the pop-up window, enter team name and check the member adapters:
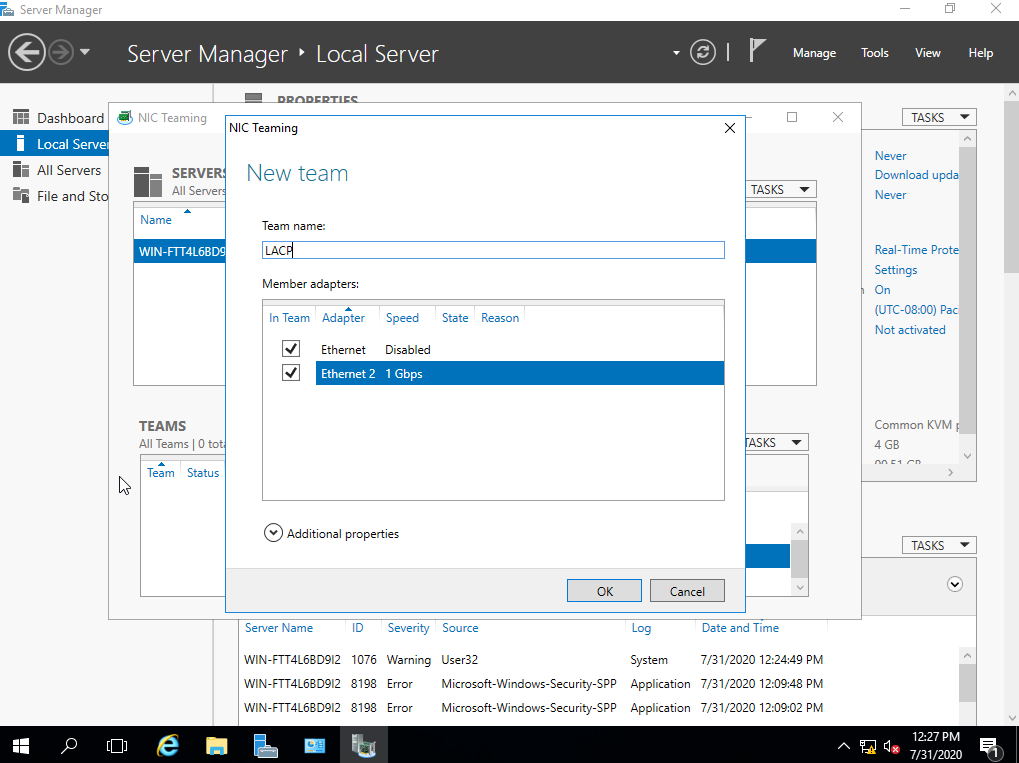
Then right-click on the newly created team and select Properties.
At the bottom of the screen, click on Additional properties and change teaming mode to LACP as shown below:
Assign IP address to the teaming interface:
Go to Control Panel
View network status and tasks
Change adapter settings
Right-click on your new teaming interface -> Properties
Double-click on “Internet Protocol Version 4 (TCP/1Pv4)”

(Optional) Configure network access for management OS:
Enable it if:
The team or NIC is the only connection between your Hyper-V host and the network.
You want to manage the server remotely via that NIC.
Disable it if:
You’re isolating that NIC purely for VM traffic.
You have another NIC or team dedicated to host management.
–
Open Hyper-V Manager
Select your host, then click Virtual Switch Manager (right pane)
Click New virtual network switch > External > Create
Select a physical NIC from the dropdown
Check: Allow management operating system to share this network adapter
Click OK to apply
Using PowerShell
# Step 1: List available network adapters
Get-NetAdapter

# Step 2: Create the NIC Team using LACP mode with Dynamic load balancing
New-NetLbfoTeam -Name "TeamLACP" `
                -TeamMembers "Ethernet1","Ethernet2" `
                -TeamingMode LACP `
                -LoadBalancingAlgorithm Dynamic

# Step 3: Confirm team creation
Get-NetLbfoTeam -Name "TeamLACP"
Get-NetLbfoTeamMember -Team "TeamLACP"

# Step 4: Verify the new team interface
Get-NetAdapter -Name "TeamLACP"

# Step 5: Assign a static IP address to the team interface
New-NetIPAddress -InterfaceAlias "TeamLACP" `
                 -IPAddress 111.222.111.222 `
                 -PrefixLength 24 `
                 -DefaultGateway 111.222.111.1

# Step 6: Set DNS server addresses
Set-DnsClientServerAddress -InterfaceAlias "TeamLACP" `
                           -ServerAddresses 1.1.1.1, 8.

# Step 7: Show detailed team information
Get-NetLbfoTeam | Format-List *


# Step 8: Verify final configuration
Get-NetAdapter -Name "TeamNIC"
Proxmox
For Proxmox, simply edit /etc/network/interfaces file:
auto lo
iface lo inet loopback

iface eno1 inet manual
iface eno2 inet manual

auto bond0
iface bond0 inet manual
   bond-slaves eno1 eno2
   bond-miimon 100
   bond-mode 802.3ad
   bond-xmit-hash-policy layer2+3
   bond-min-links 1
   bond-lacp-rate fast

auto vmbr0
iface vmbr0 inet static
   address 111.222.111.222/24
   gateway 111.222.111.1
   bridge-ports bond0
   bridge-stp off
   bridge-fd 0
Don’t forget to rename your interfaces to the real one, as well as replace IPs for vmbr0 interface.
To apply the changes, run ifreload -a.
ESXi
Configure active-active connection on ESXi without vSphere using CLI
This case will require some adjustments on our side. Please contact out support team and tell that you want to configure active-active connection on your server.
esxcli network vswitch standard add --vswitch-name=vSwitch1

# Add uplinks
esxcli network vswitch standard uplink add --uplink-name=vmnic0 --vswitch-name=vSwitch1
esxcli network vswitch standard uplink add --uplink-name=vmnic1 --vswitch-name=vSwitch1

# Set load balancing and active-active teaming
esxcli network vswitch standard policy failover set \
  --vswitch-name=vSwitch1 \
  --load-balancing=iphash \
  --active-uplinks=vmnic0,vmnic1 \
  --standby-uplinks=""

# Create port group
esxcli network vswitch standard portgroup add --portgroup-name=VM_Network --vswitch-name=vSwitch1

# Assign VLAN
esxcli network vswitch standard portgroup set --portgroup-name=VM_Network --vlan-id=10

# Add VMkernel interface
esxcli network ip interface add --interface-name=vmk1 --portgroup-name=VM_Network


# Set portgroup policy to inherit everything except failover order
esxcli network vswitch standard portgroup policy failover set \
  --portgroup-name=VM_Network \
  --override-failover-order=true \
  --active-uplinks=vmnic0,vmnic1 \
  --standby-uplinks=""

# Assign static IP to VMkernel
esxcli network ip interface ipv4 set \
  --interface-name=vmk1 \
  --type=static \
  --ipv4=111.222.111.222 \
  --netmask=255.255.255.0 \
  --gateway=111.222.111.1

# Show result
esxcli network vswitch standard list
esxcli network vswitch standard uplist list
esxcli network ip interface list
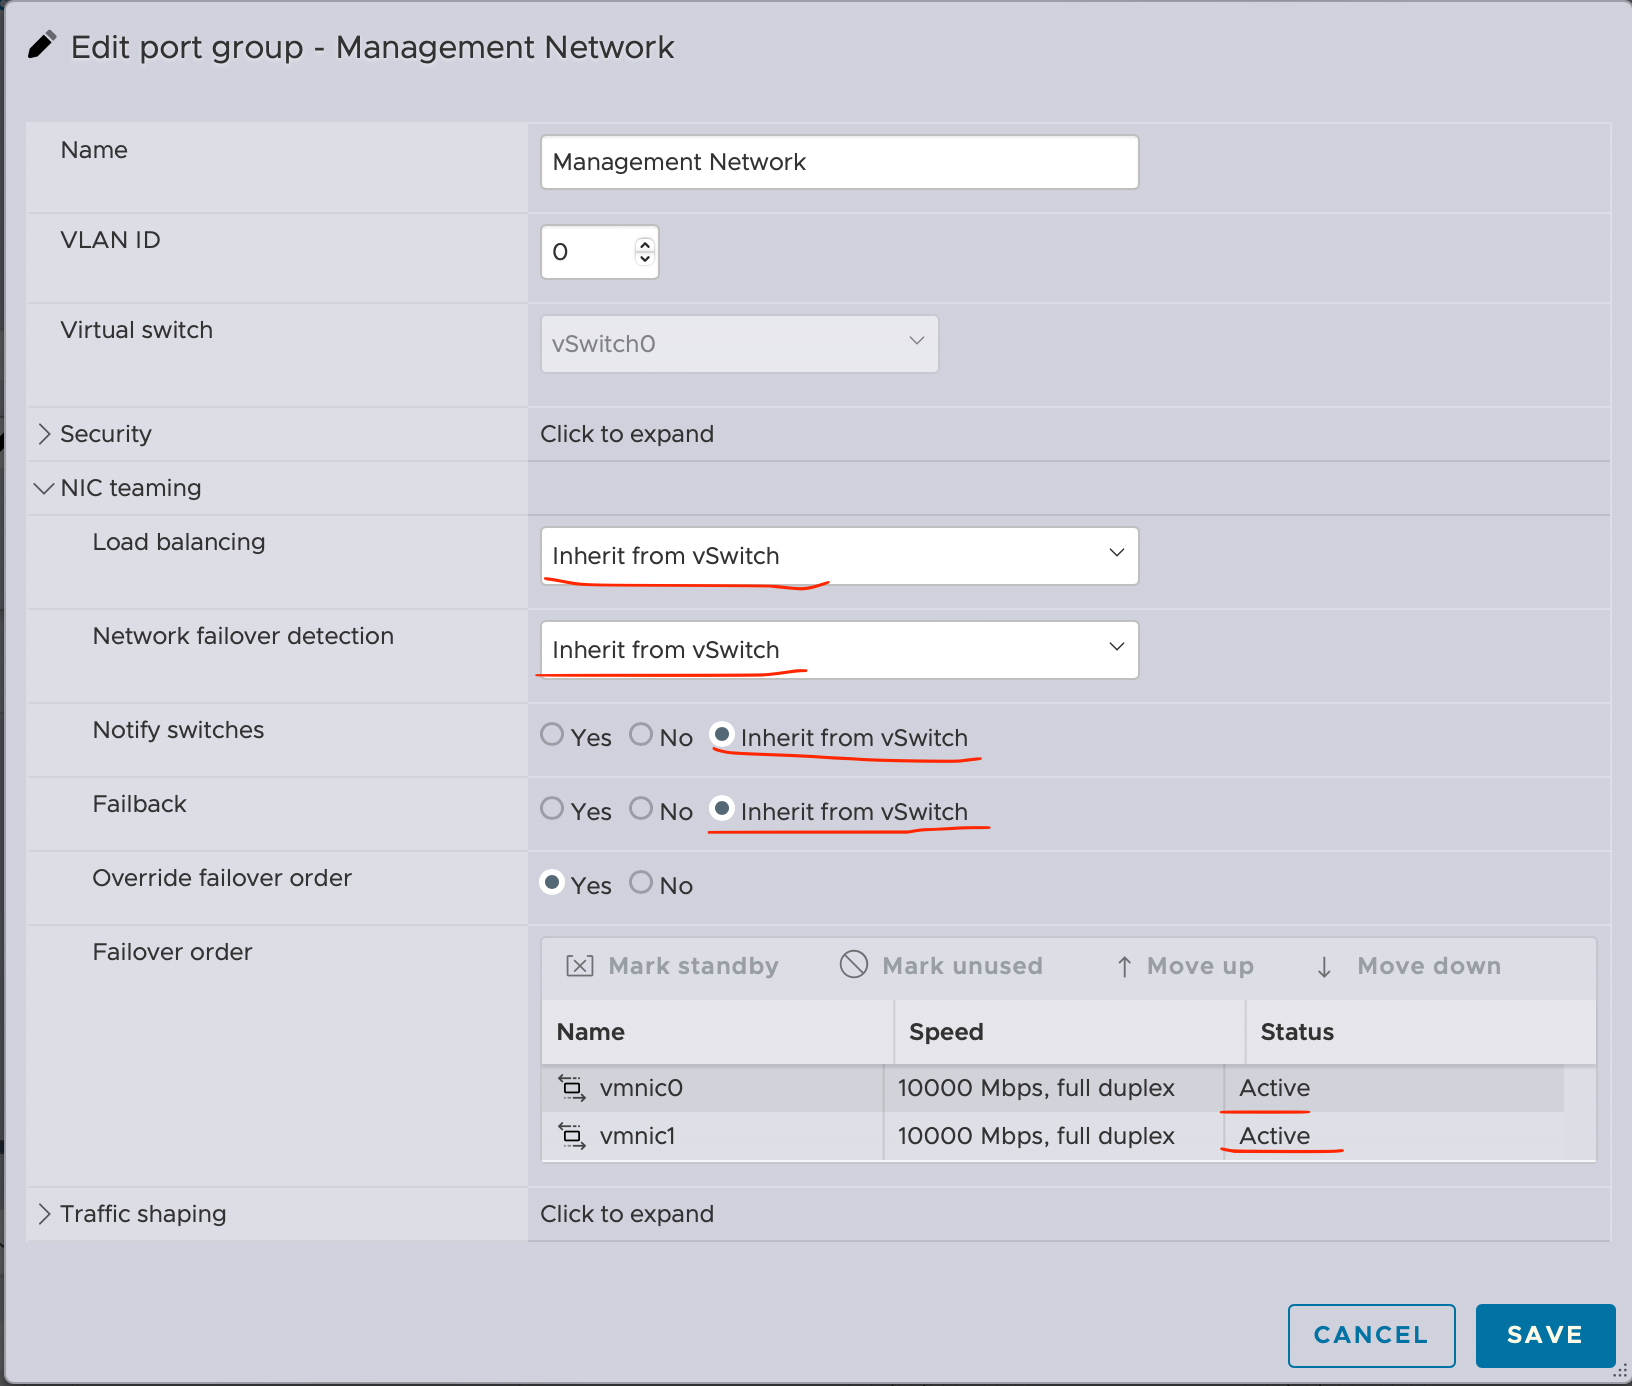
Configure active-active connection on ESXi without vSphere using web-interface
Log in to the ESXi Host Web UI
URL: https://<ESXi-IP-or-hostname>/
Use the root credentials.
Navigate to Networking:
In the left panel, go to Networking.
Choose the Virtual Switch (vSwitch):
Click “Virtual switches”.
Select the vSwitch you want to configure (e.g., vSwitch0).
Edit the vSwitch:
Click “Edit settings”.
Go to the “NIC teaming” section.

LACP Configuration with VMware ESXi – (vCenter config)
Requirements
To successfully establish LACP between an ESXi host and the network switch, there are a few requirements that should be met. Here are the most important requirements that you should take into account. Many of these requirements are valid for all types of LACP configurations.
ESXi with LACP can only be established between the host and a single switch or a ‘stacked’ switch.
The configuration on the switch should be set to static mode ON and the VMware vSwitch should be configured with load balancing method Route based on IP hash.
Do NOT use beacon probing with IP hash load balancing.
ESXi 5.1, 5.5, 6.0, and 6.5 only support LACP on a distributed virtual switch.
Configuring LACP on vSphere side
Because the configuration of LACP between an ESXi host and a network switch requires configurations on both ends, we will explain the configuration in a chronological order which worked for our scenarios. Hence, while the steps could be performed in other orders, we feel most confident with our method.
The screenshots we took are done in VMware vCenter Server 6.7.
First of all, start by connecting to the VMware vCenter UI.
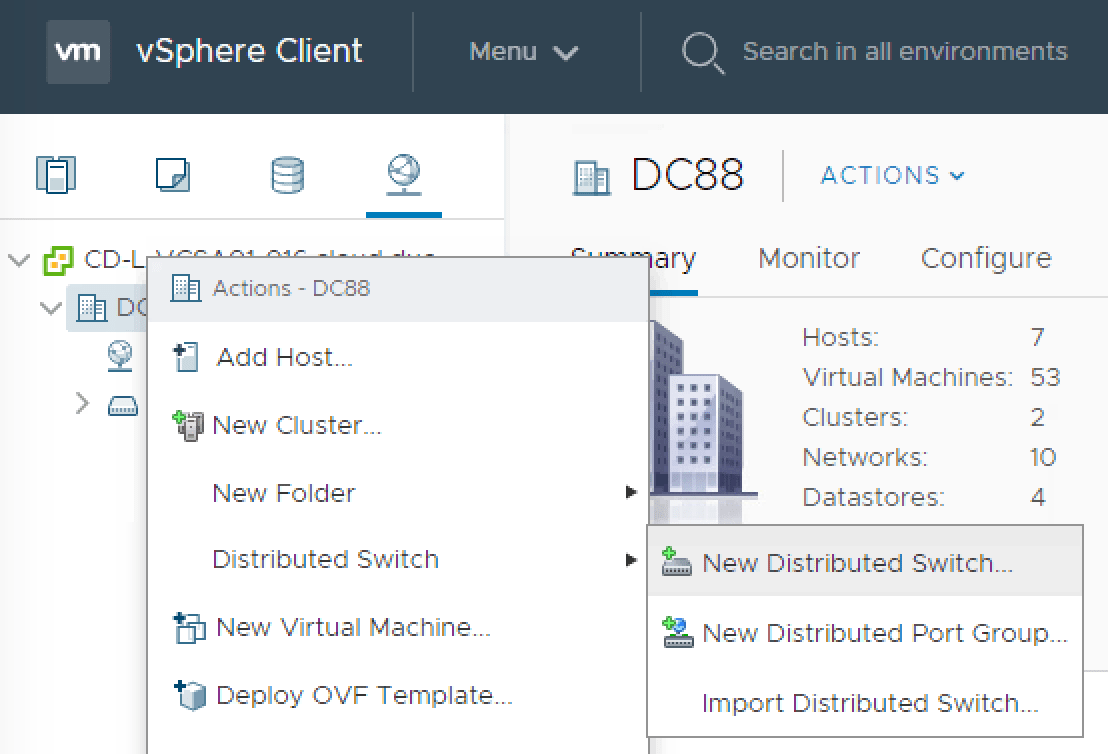
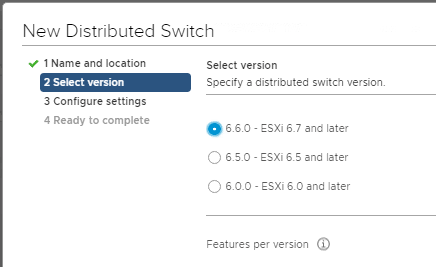
Creating a distributed switch:
Right-click on the datacenter object and select Distributed Switch > New Distributed Switch…
Give the new distributed switch a sensible name.
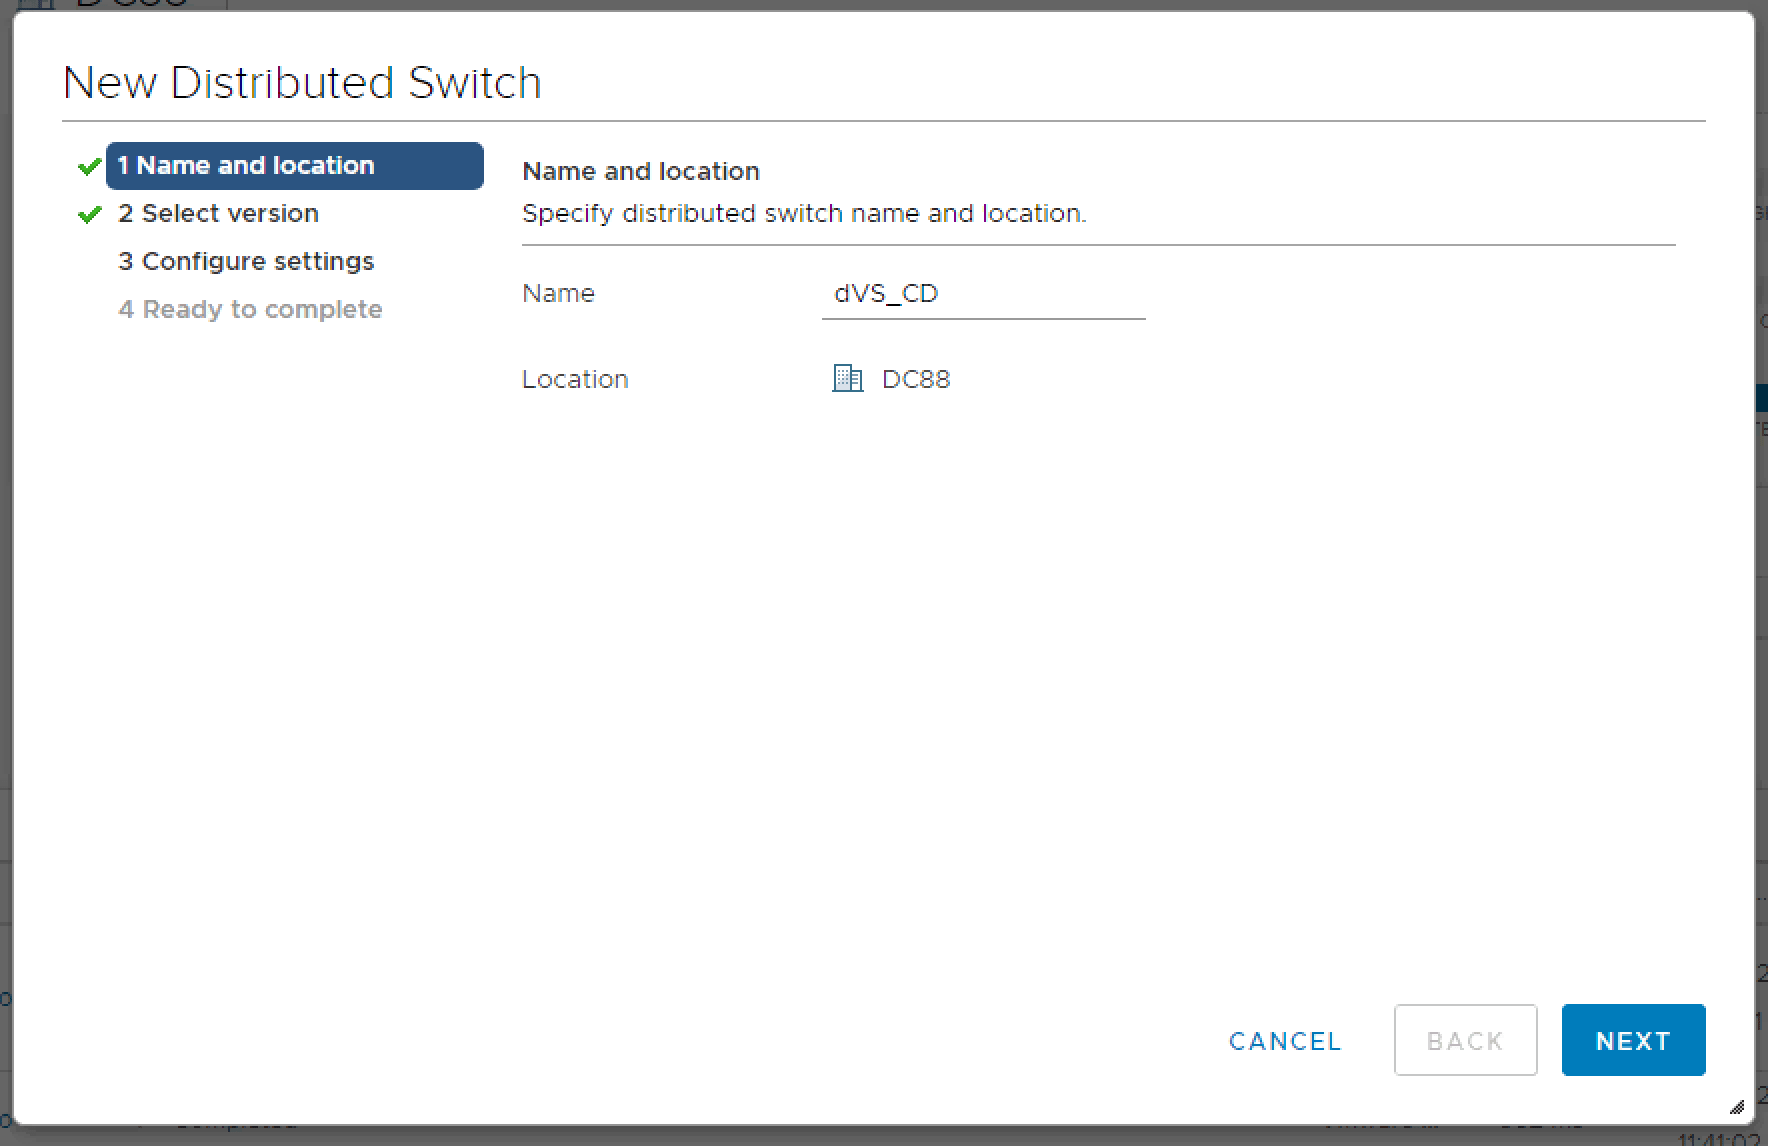
Choose a version for your distributed switch.
Note
Keep in mind that if you are running an older version of vCenter, LACP has been introduced since 5.1. Selecting older dVS versions might not allow you to create a LACP.
Configure your new dVS with the following parameters:
Number of uplinks
Network I/O Control
Creation of a default port group (optional)
Name of the default port group

Validate your dVS settings before submitting.

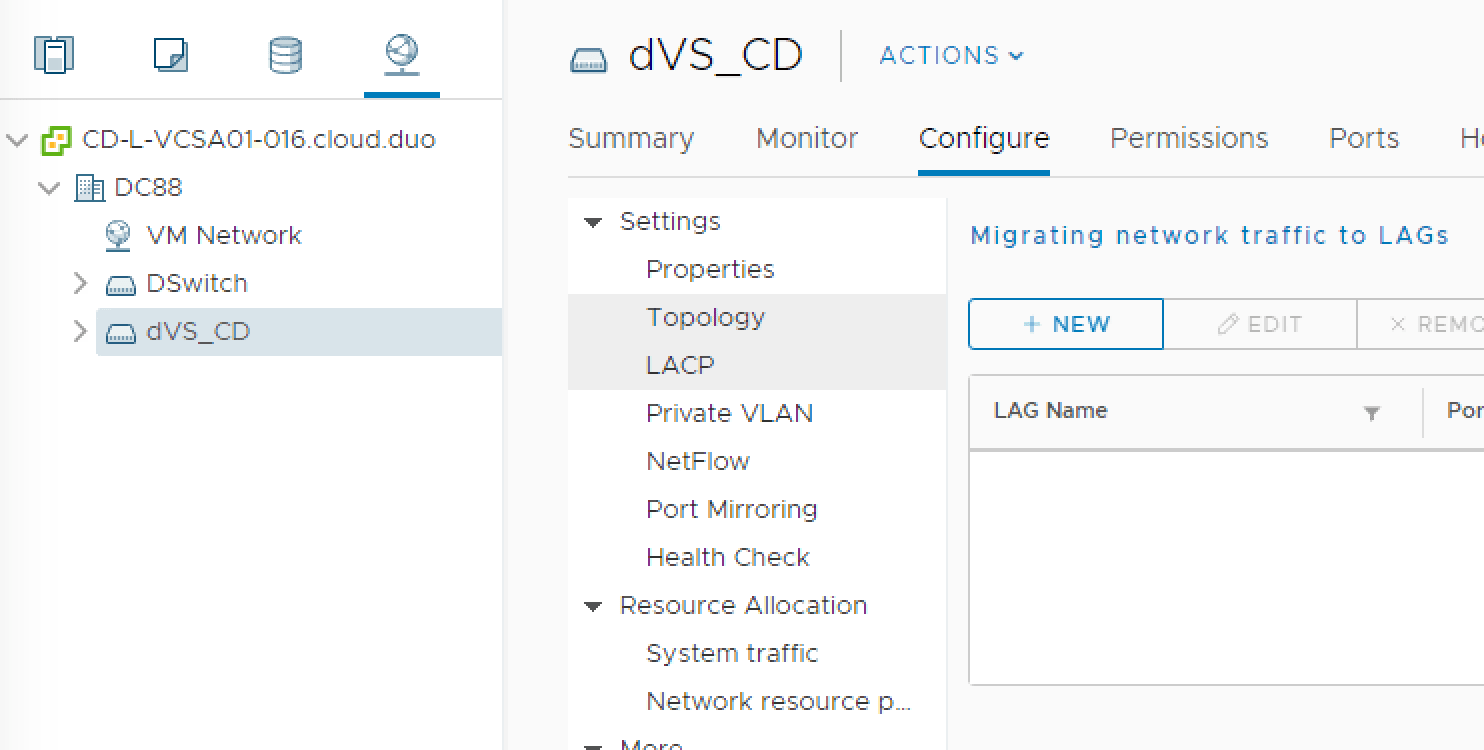
Next, we will create a LACP Group within dVS:
Left-click on the new dVS > Configure > LACP > + New
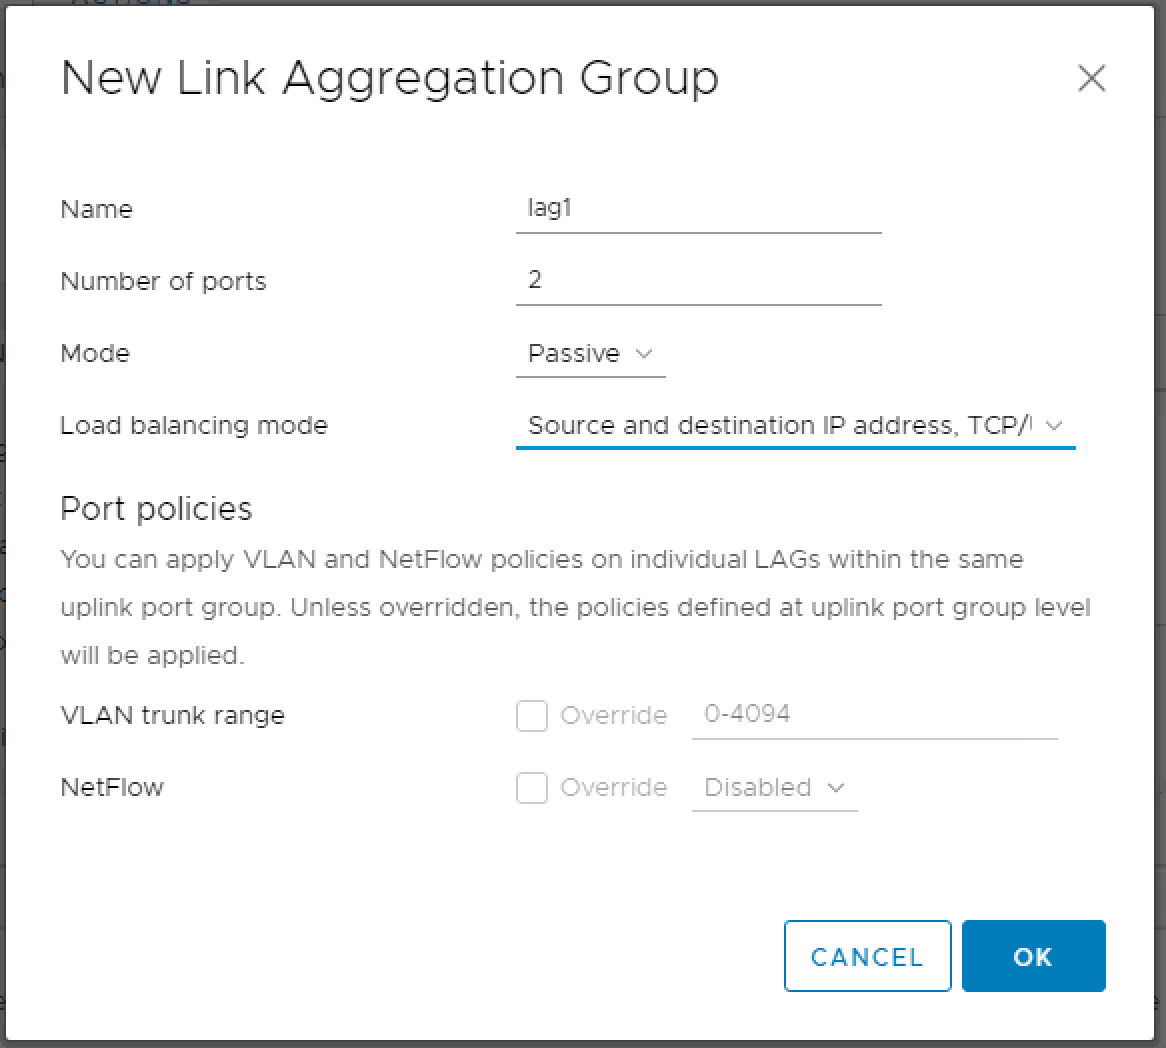
Next up, we will add an individual link to the vDS in the LAG:
Adding ESXi host to vDS
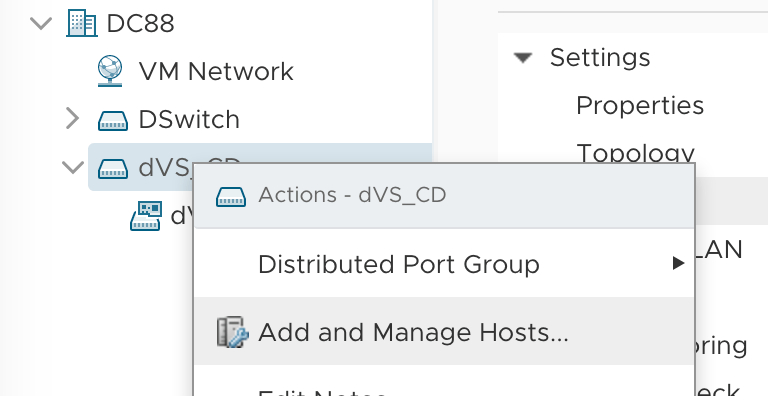
Choose Add hosts
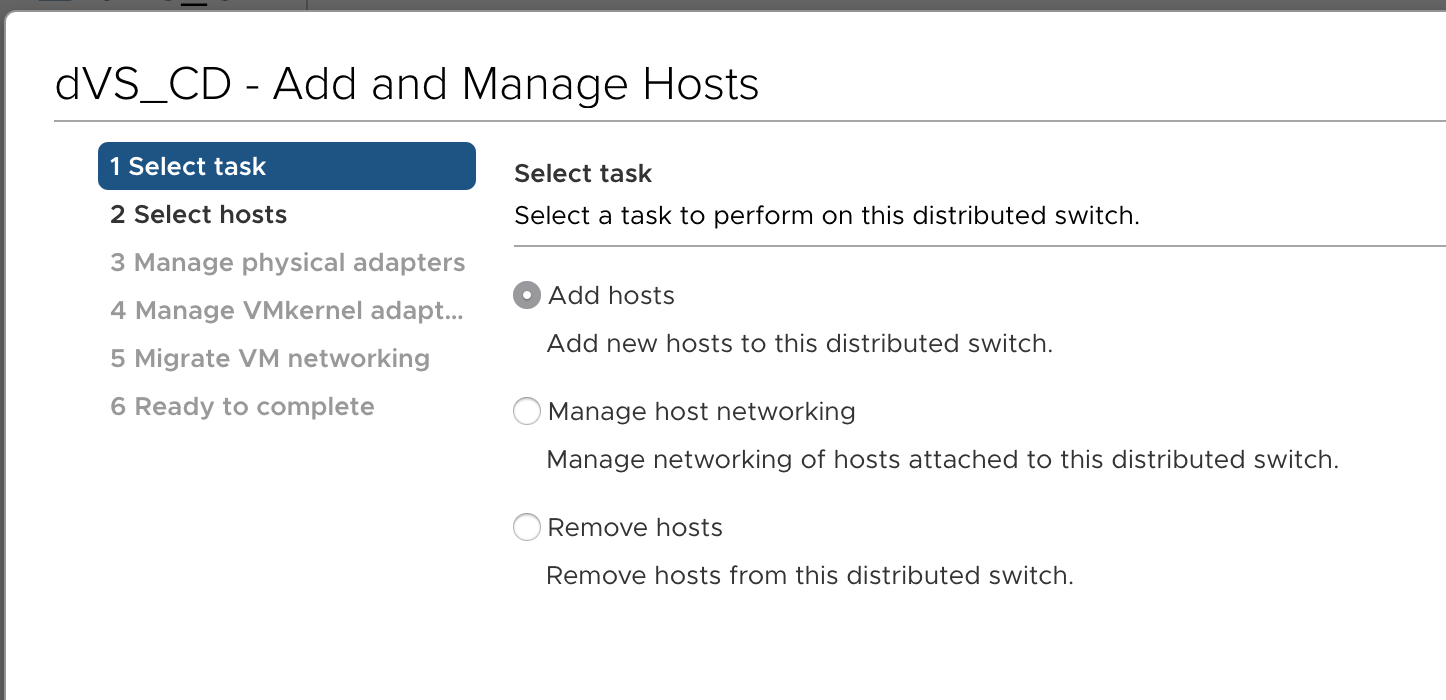
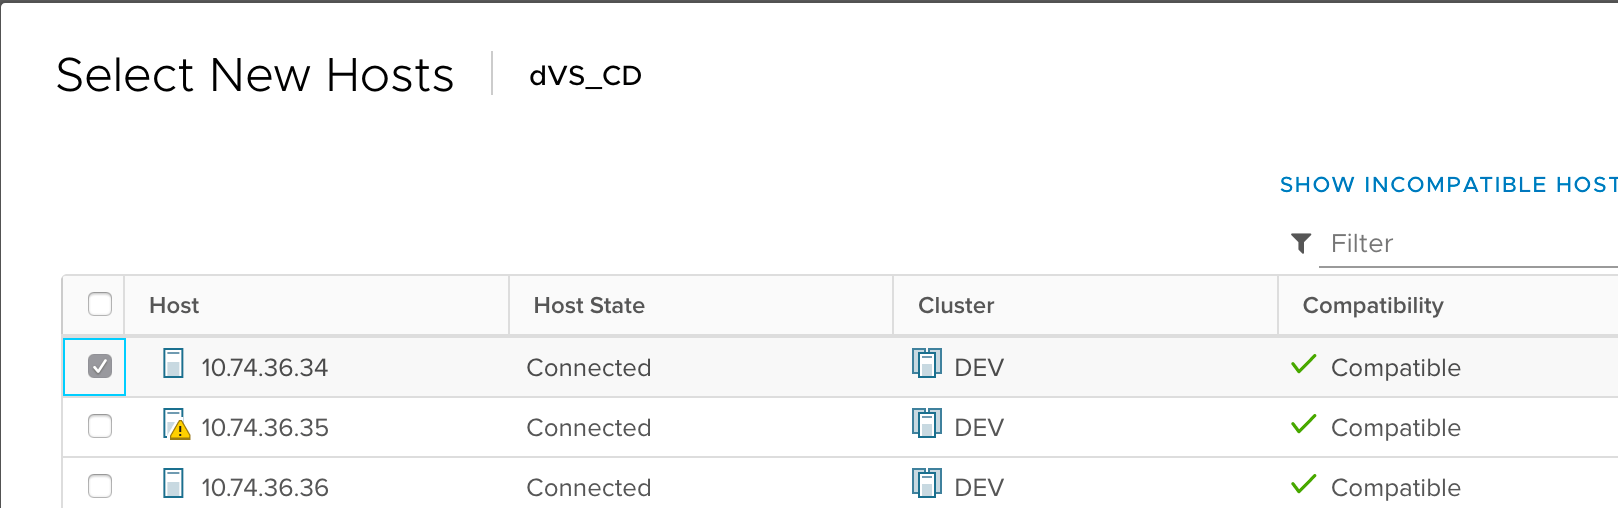
Click + to add hosts
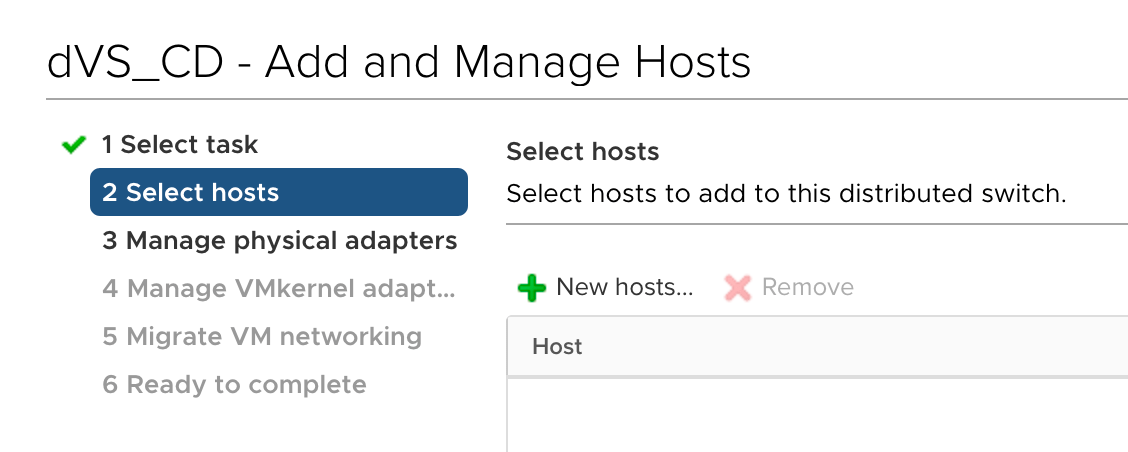
Select appropriate hosts to add to the dVS
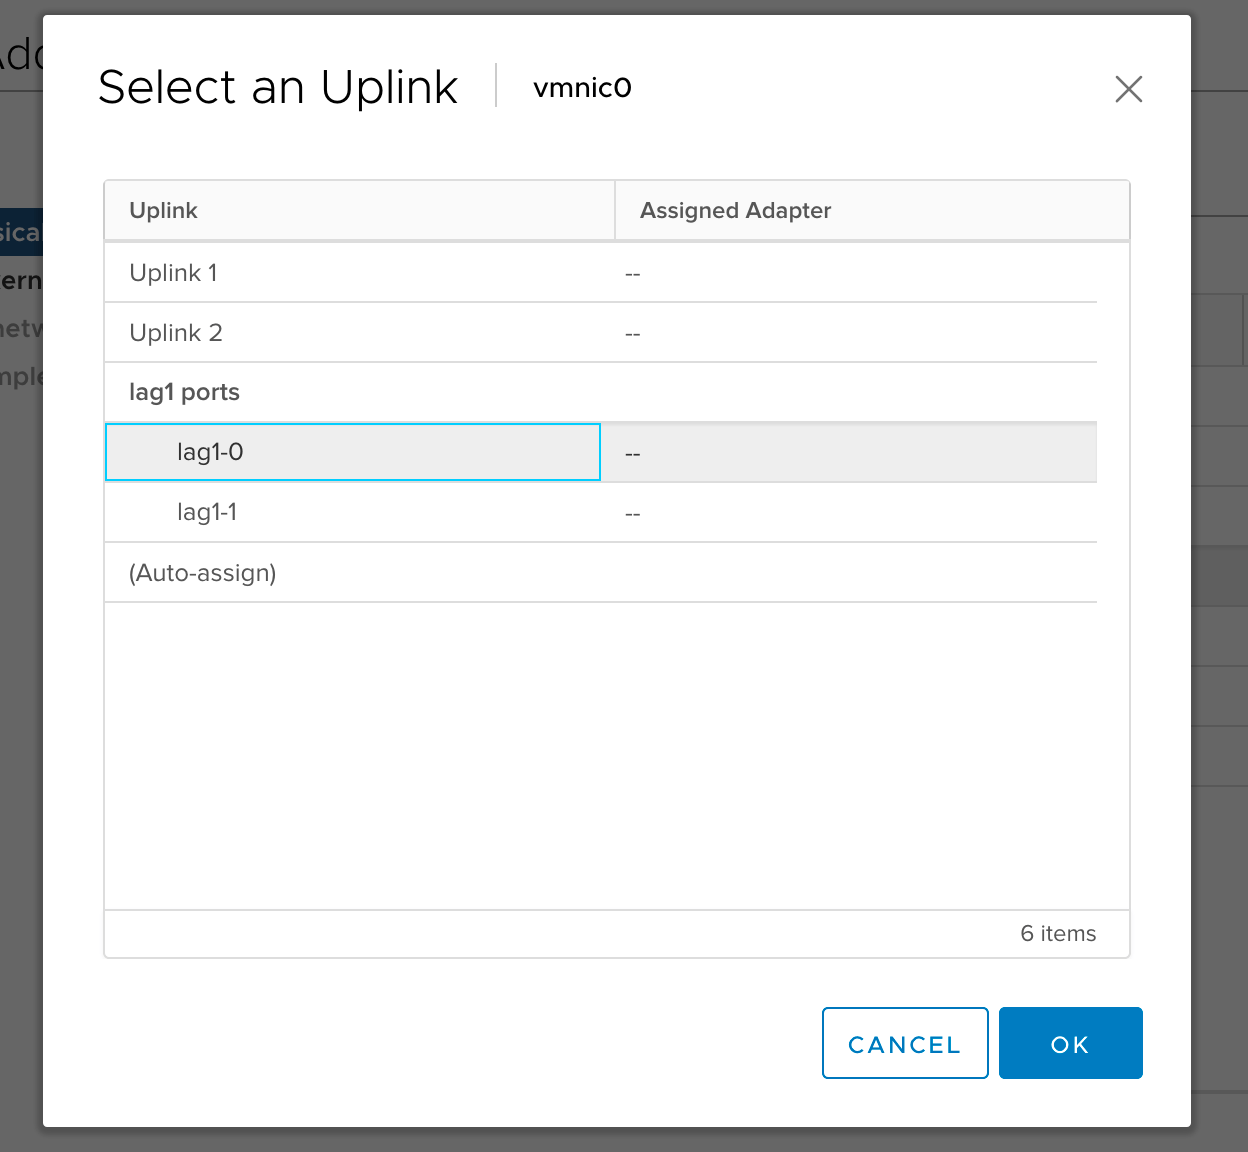
During step 3, choose a NIC that will join the LAG

Assign the NIC to the LAG