Migrating Your Infrastructure From Hyper-V To 3HCloud


Organizations aim to optimize infrastructure, enhance flexibility, and boost server efficiency. Virtualization helps achieve these goals by enabling the creation and management of virtual servers on physical hardware. Migrating infrastructure to the 3HCloud platform from Hyper-V is a strategic move to gain these advantages.
We will focus on the process of migrating infrastructure from Hyper-V to 3HCloud, outlining its advantages and the steps required for successful implementation. Recommendations are also provided to help address potential challenges.
Example
Let's move on to practice.
Analysis and planning
The first step in migrating from Hyper-V to 3HCloud is to analyze the existing infrastructure and develop a detailed migration plan. This will help avoid problems during migration.
Preparing The 3HCloud Environment
You need to prepare the 3HCloud environment before starting the migration. Begin by installing the required utilities and programs for your virtual machines to ensure compatibility with the 3HCloud infrastructure.
We use Legacy boot mode by default, but UEFI support is also available. If necessary, we can enable this boot mode for your image.
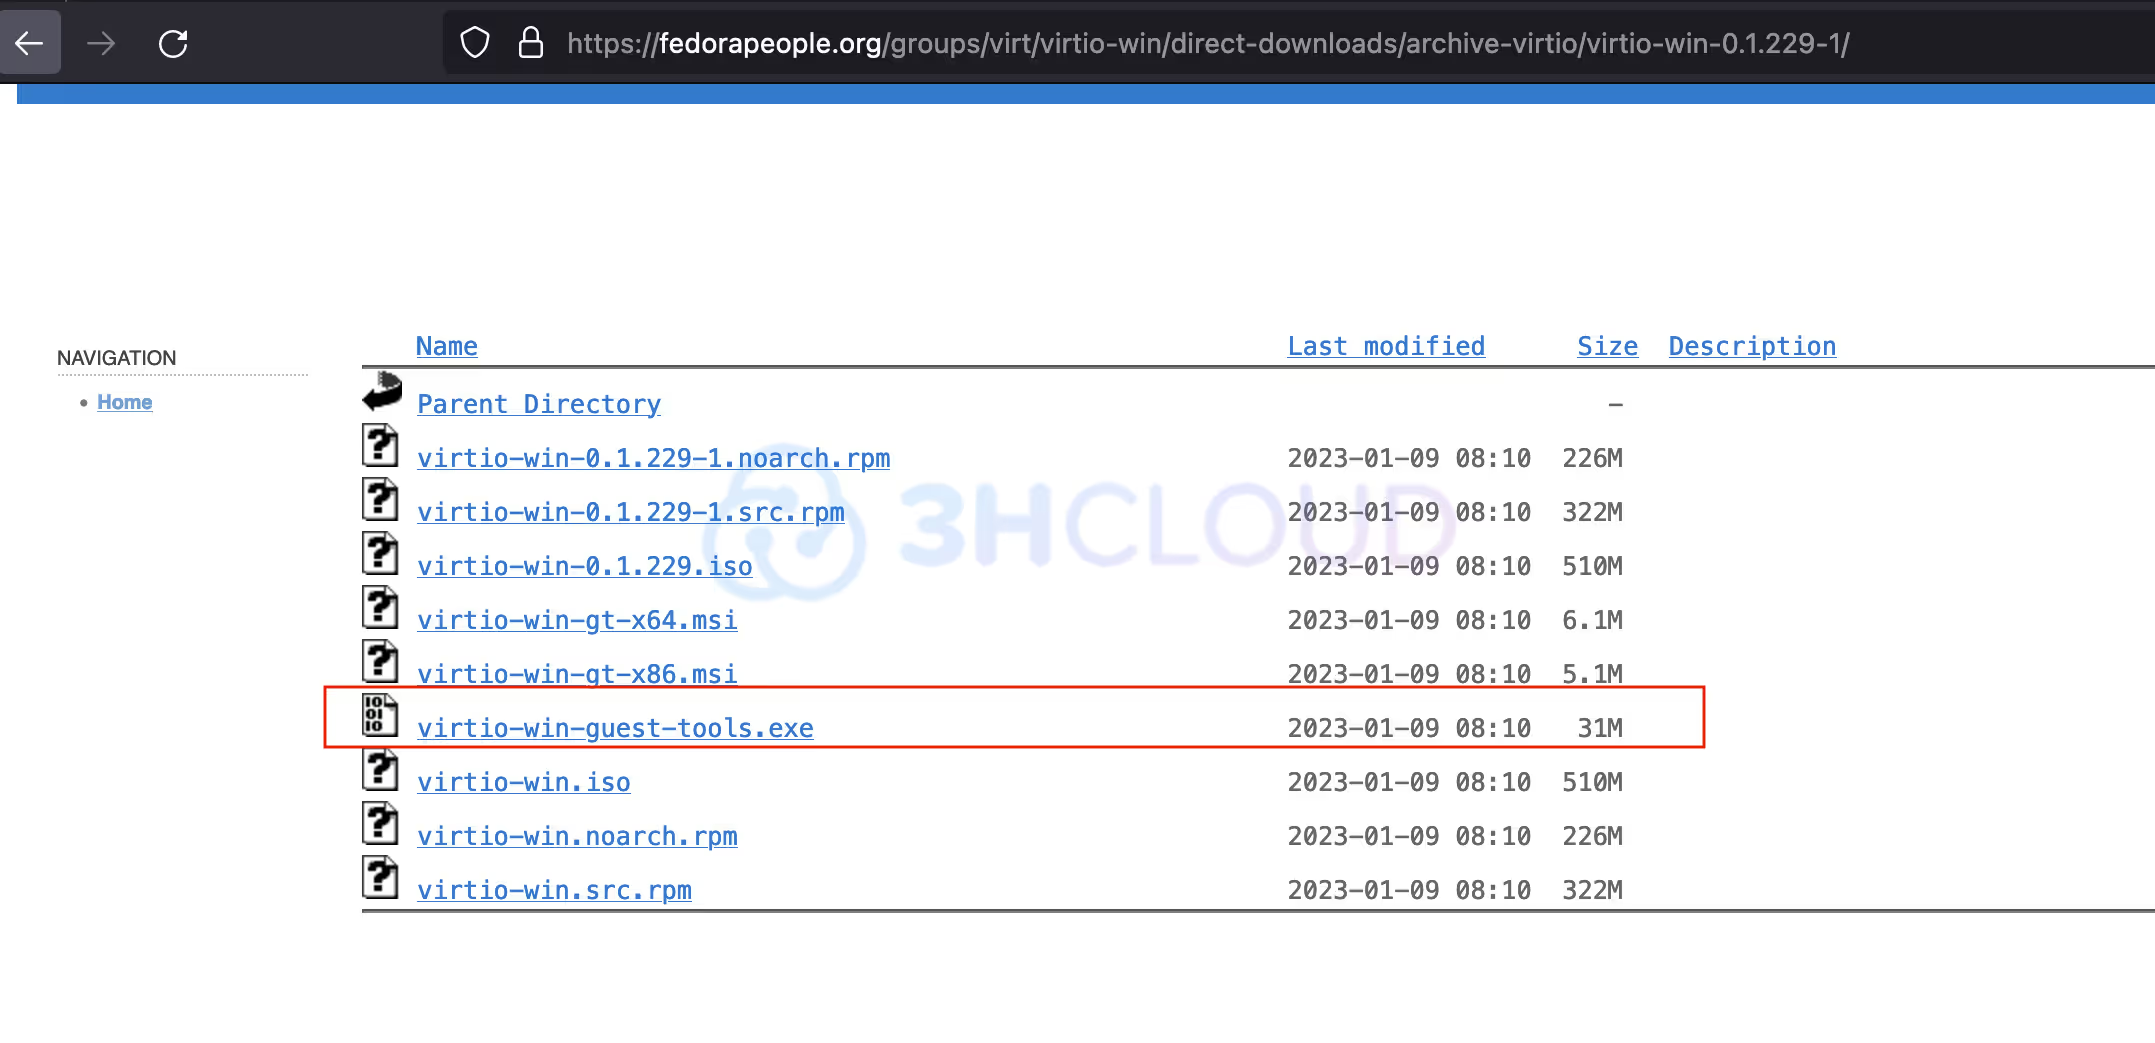
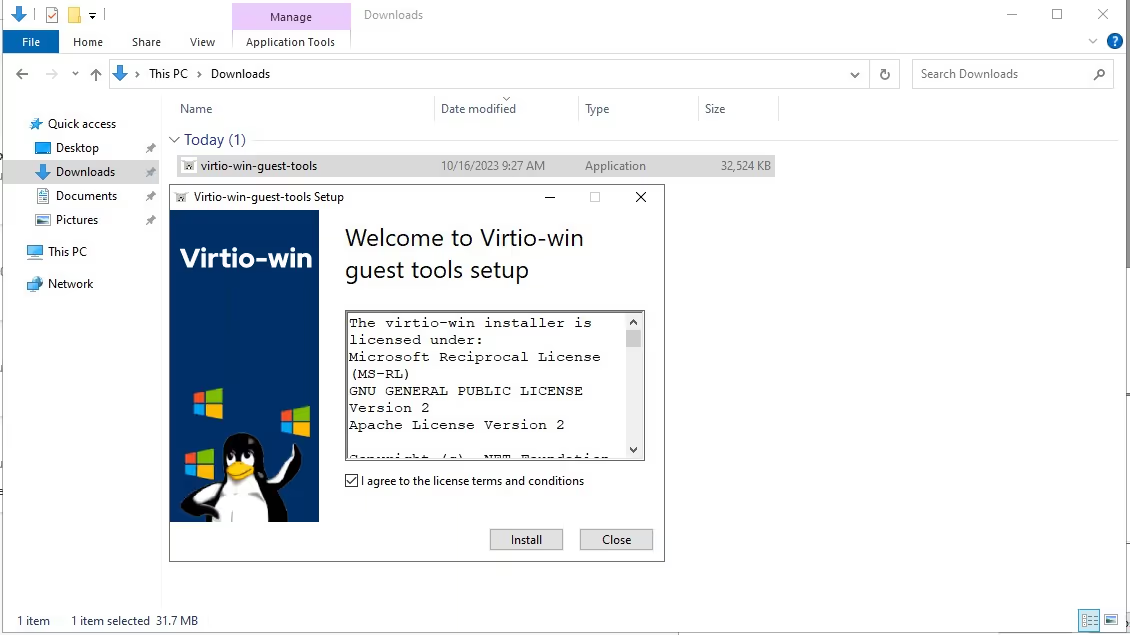
Let’s consider an example of using the Windows operating system. It’s necessary to install utilities virtio-win-guest-tools.exe.
1. Download and immediately launch, agree to the license agreement, and click Install.
2. Then check that all modules are added.
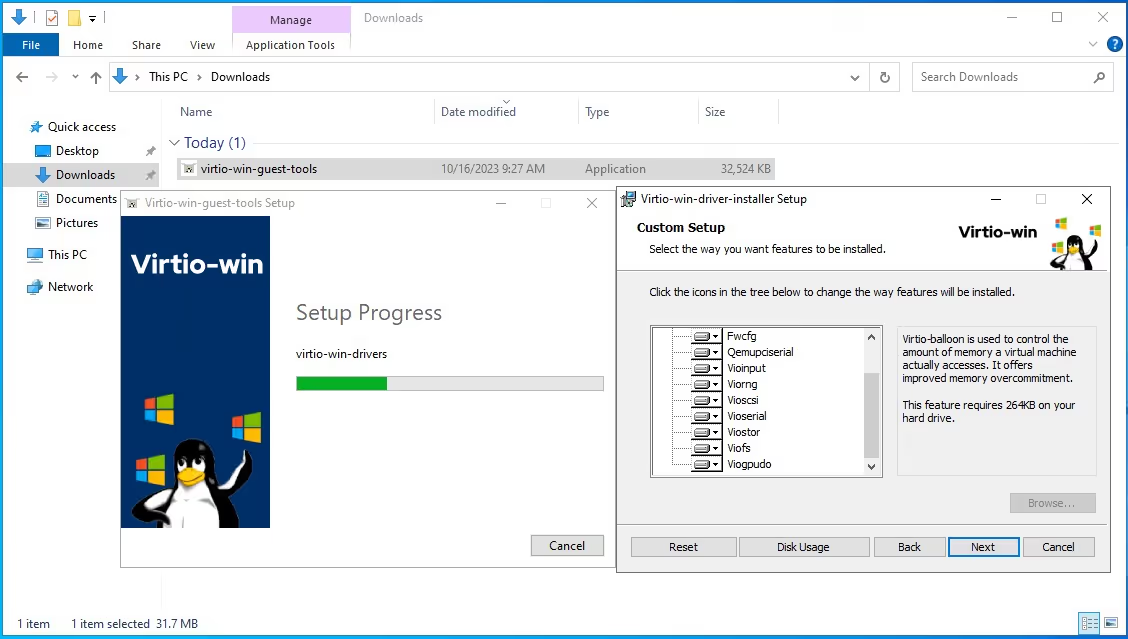
3. Launch the installation.
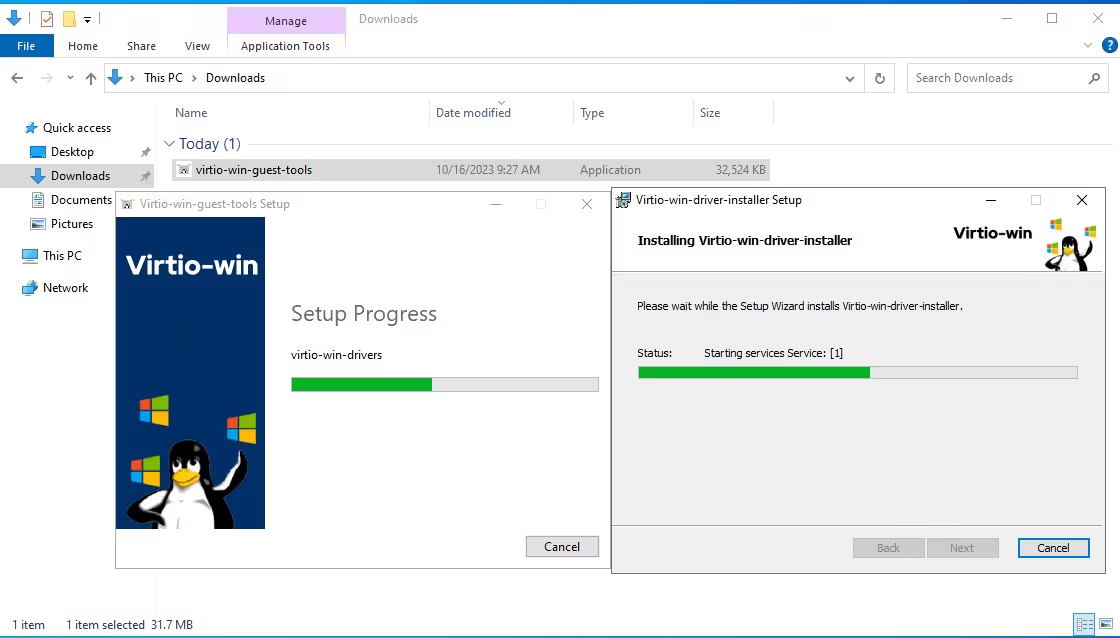
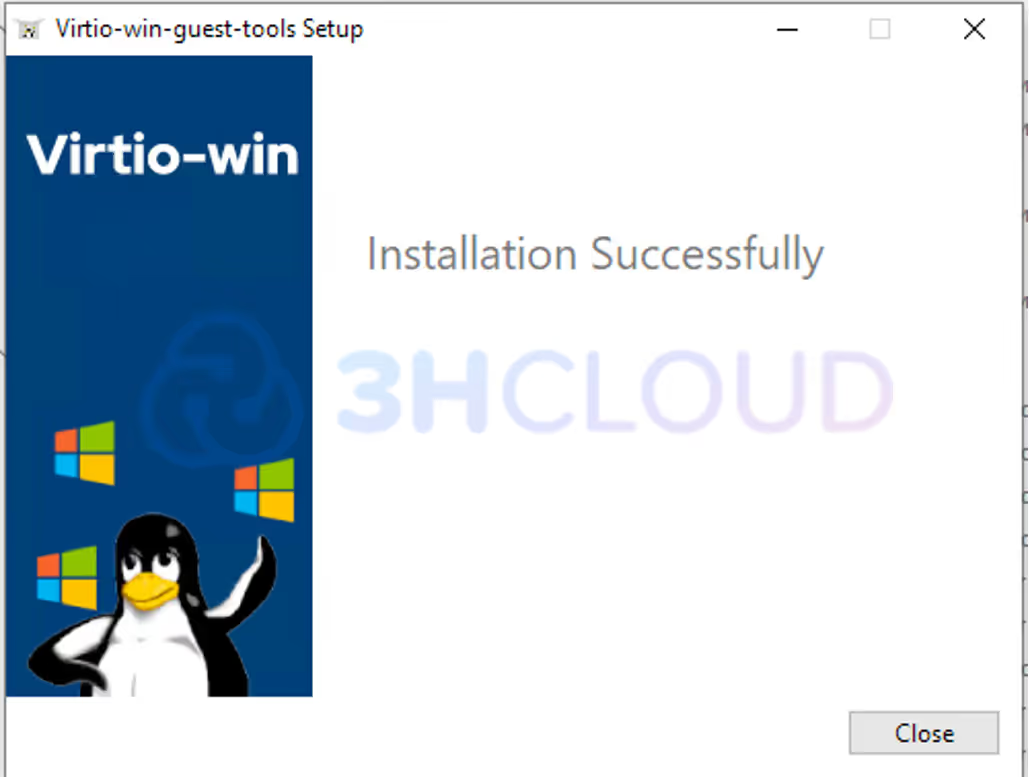
4. The program is now ready to use.
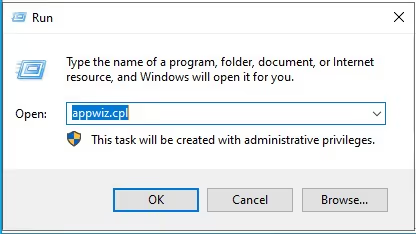
5. Check its presence in 'Programs and Components' by pressing the Win+R key combination and entering the appwiz.cpl command.
Thus, the soft installation process is complete.
Preparation For Linux Distributions
Install the utilities and add them to the startup. Below are the command options for different distributions.
1. Debian:
$ sudo apt install -y acpid cloud-init qemu-guest-agent cloud-guest-utils && \ systemctl enable qemu-guest-agent acpid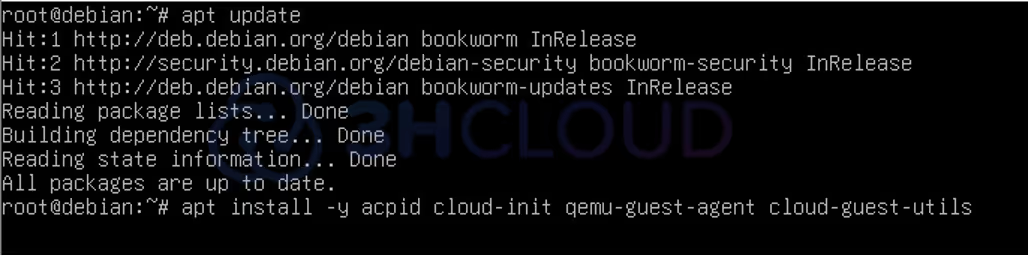

2. RHEL Yum Package Manager:
$ sudo yum install -y acpid cloud-init qemu-guest-agent cloud-utils-growpart && \ systemctl enable qemu-guest-agent && echo "NOZEROCONF=yes" >> /etc/sysconfig/network && systemctl enable acpid

3. RHEL DNF Package Manager:
dnf install -y acpid cloud-init qemu-guest-agent cloud-utils-growpart && \ systemctl enable qemu-guest-agent && echo "NOZEROCONF=yes" >> /etc/sysconfig/network && systemctl enable acpidHyper-V Virtual Machine Conversion
We will proceed with converting virtual machines from Hyper-V to a 3HCloud-compatible format after preparing the 3HCloud environment. In this phase, we will explore the tools and methods that can be used for this conversion, as well as discuss possible problems and recommendations for a successful conversion.
Image Conversion Using V2V Image Converter
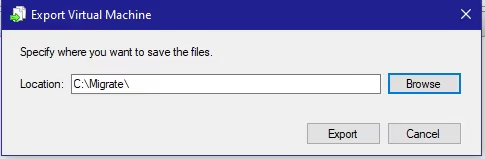
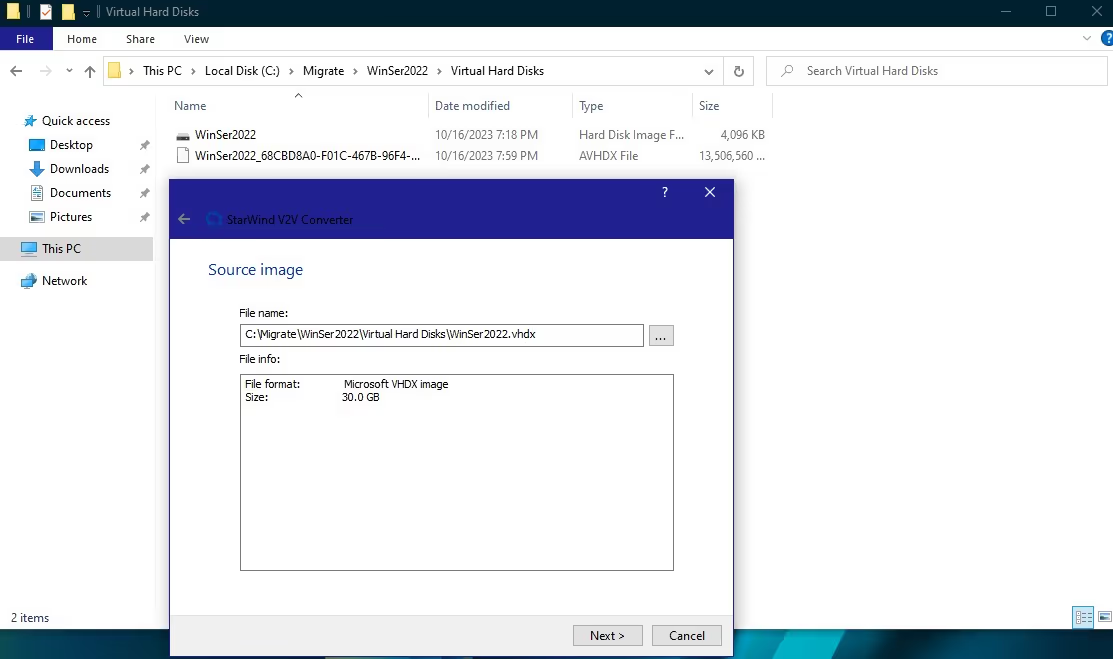
You can either export an image of your virtual machine or navigate to the folder where this image is stored. In this guide, we will utilize the Windows program “V2V Image Converter”. StarWind V2V Image Converter is a utility designed for converting virtual disk files. It is free, but you will need to send a request to the developer's email to obtain the software.
All the next actions are the same when converting an image of any OS.

1. Launch the program and click Next.
2. Select the VM image that needs to be converted.
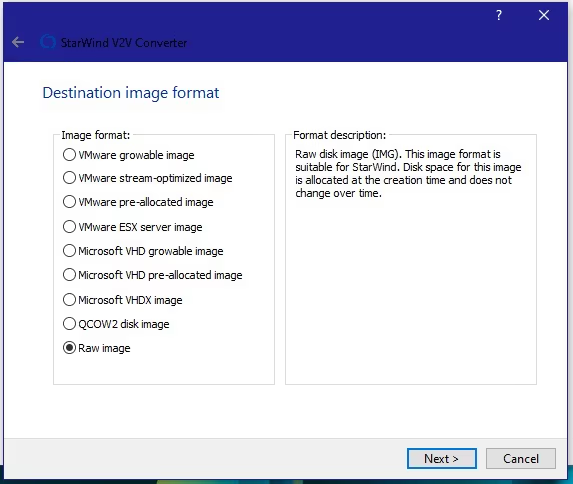
3. Set the RAW format and click Next.
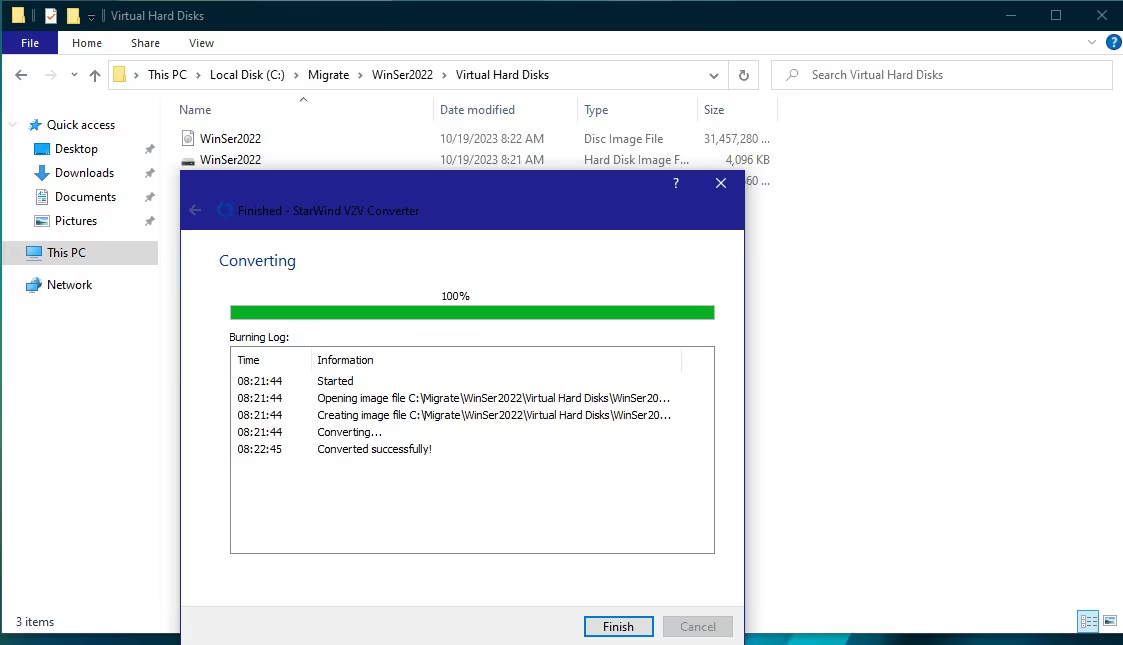
4. The conversion process has started.
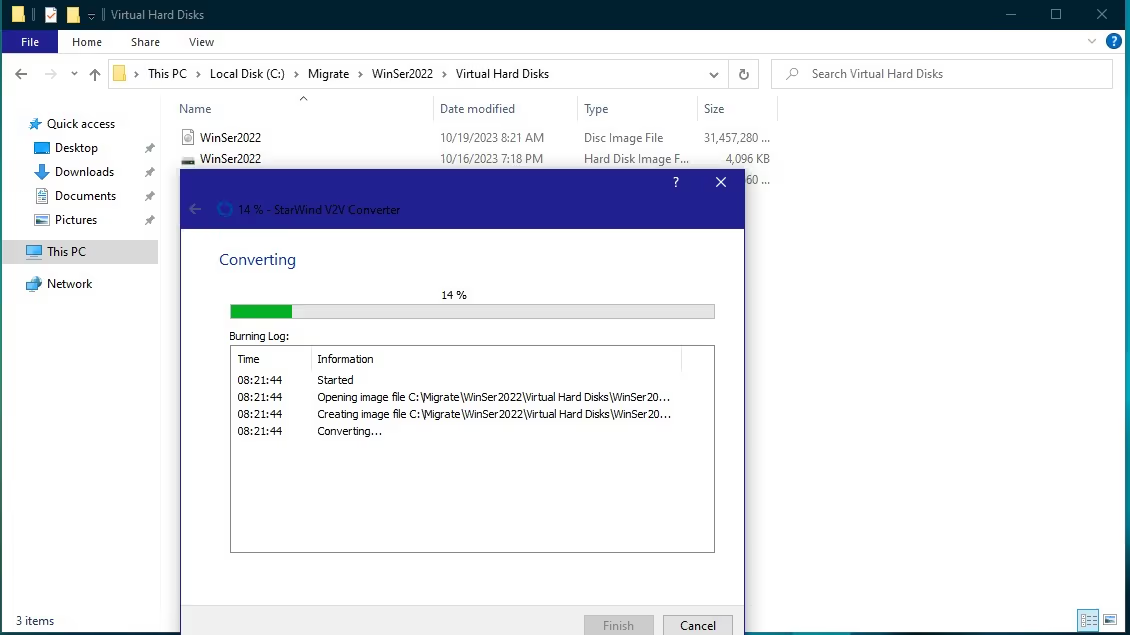
5. As a result, the image was successfully converted.
Next, we have two options to choose from:
- Send an image in .img format to 3HCloud support.
- Take advantage of the power of PowerShell and translate the image from img to raw using the command listed below:
Rename-Item -Path 'X:\..\VM\WS2022\Disc.img' -NewName 'X:\..\VM\WS2022\Disc.raw'where X is your disk with the VM image.
The Command Line Converting
You can also convert an image using the qemu-img command line tool to manage disk images. If the program is already installed, you can quickly convert the image to the raw format.
If the installation is still required, then this can be done using the following command:
$ sudo apt install qemu qemu-kvm libvirt-daemon libvirt-clients bridge-utils virt-manager && \ systemctl enable libvirtdThen you can immediately start the process of converting your image to raw format:
1. Command for Debian:
$ sudo apt install qemu-utils2. Command for RHEL:
$ sudo yum install qemu-img
$ sudo qemu-img convert -f vpc -O raw Way to the image/ws2022.vhd Way_to_the_image /ws2022.raw
Data Transfer And Configuration
You have to transfer the data and configure it in the 3HCloud environment after converting the virtual machines.
To Download The Image Via The Control Panel
This method will only work if your image is up to 15 GB.
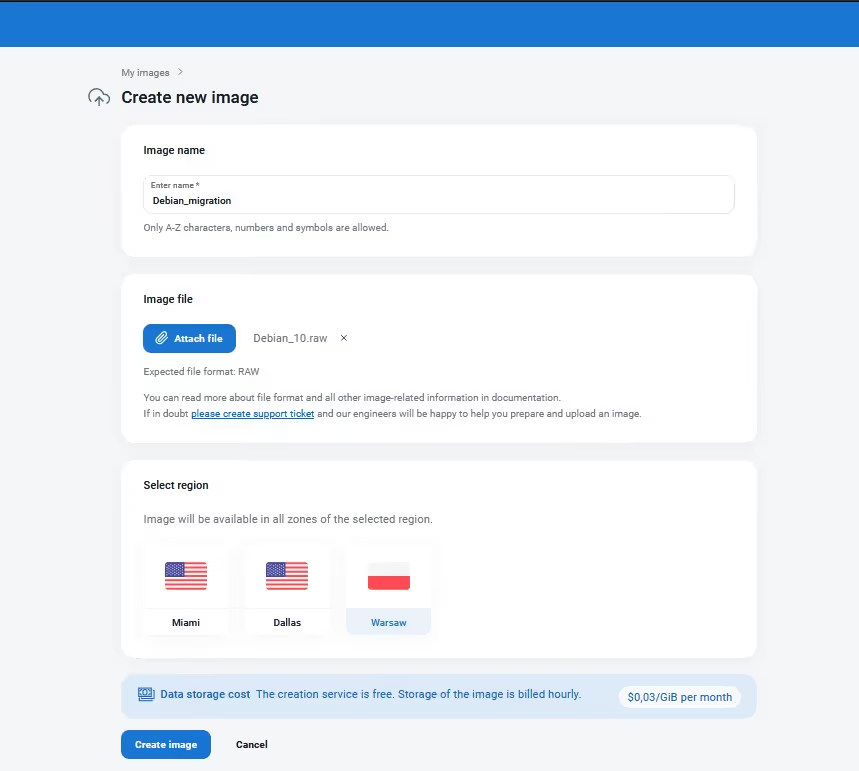
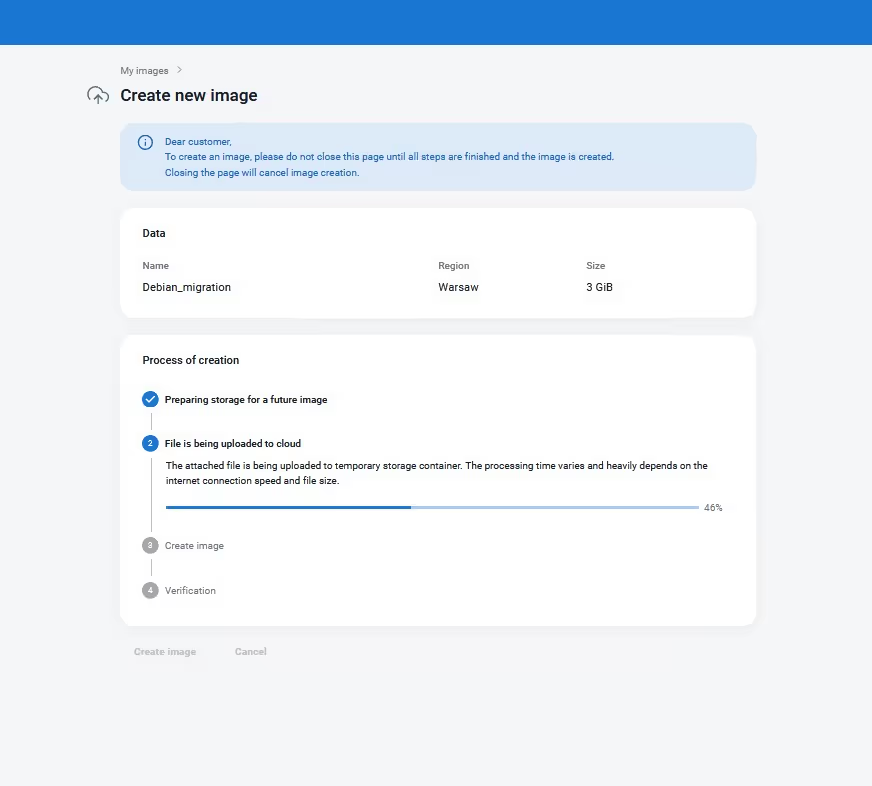
1. The process begins with the uploading of the image to your personal account.
In the Control panel go to the Cloud → My images.
2. Once the upload process is complete, let's proceed to creating a server based on the new image. Ensure that the operating system starts without problems after the migration.

To Download An Image With A Volume Over 15 GB
In this case, a suitable option would be to upload your image to the 3HCloud object storage. Alternatively, you can use your own storage. Below is an example of self-loading an image into object storage:
- Create the EC2 key.
- Create a container.
- Load your image into the container.
You can upload the image using a browser through your personal account, or use S3-browser.
- You can upload the image using a browser through your personal account or use S3-browser. Instructions for Linux are provided in the manual.
- For Windows and Mac OS, use the Cyberduck program for downloading. Ensure you have the EC2 keys created in the 'Object Storage' – 'Access' section to work with the object storage.
Once you gain access to the object storage, you can upload the image to your personal account. Consequently, you will be able to create a virtual server based on this image.
Note: You will need to name the region where you want to fill in the image.
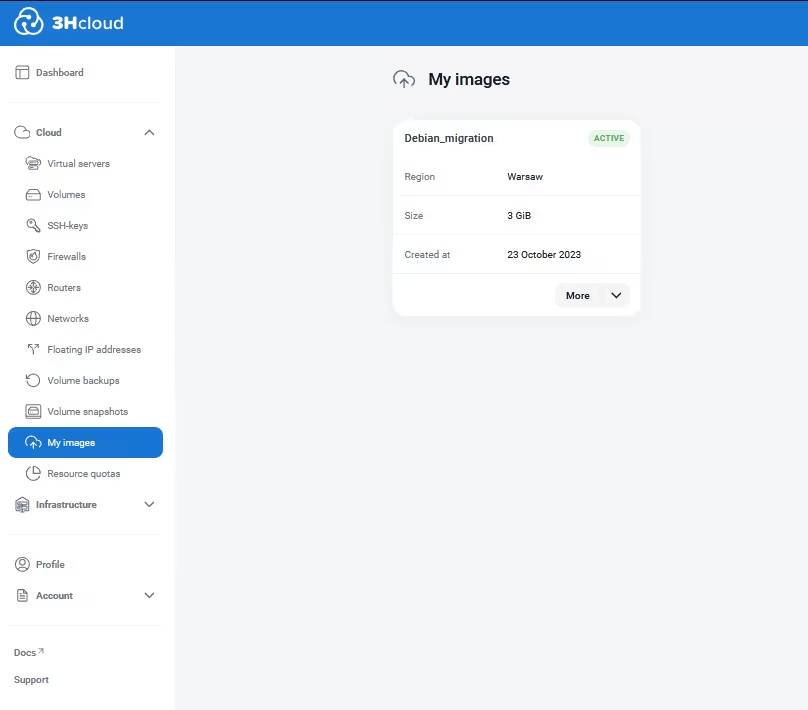
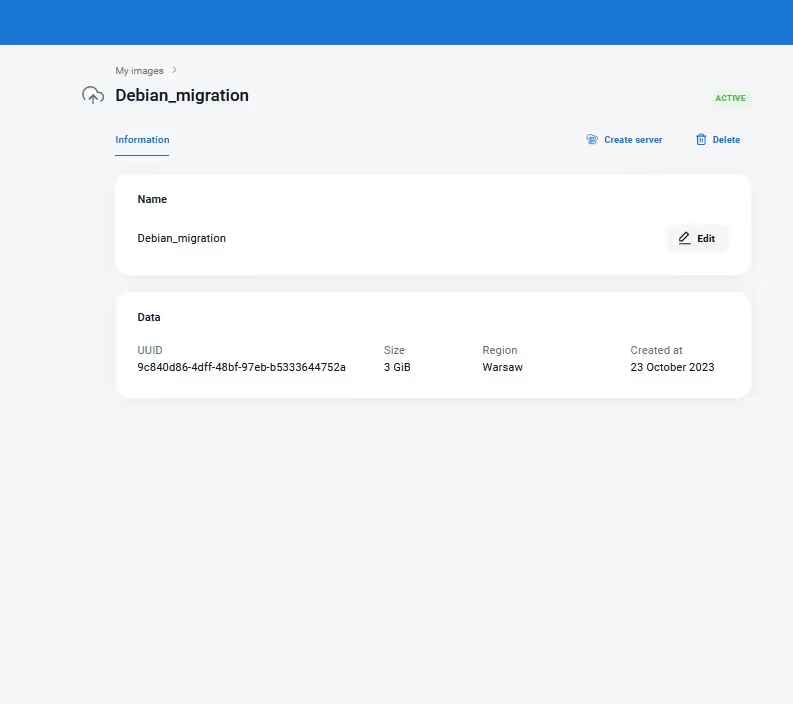
Go to the 'Cloud' section - 'My images'.
Click the 'More Details' button. So, you are redirected to the description of your image. You can create a server here.
It is important to choose a volume equal to or greater than the actual volume of your image while creating a system disk.
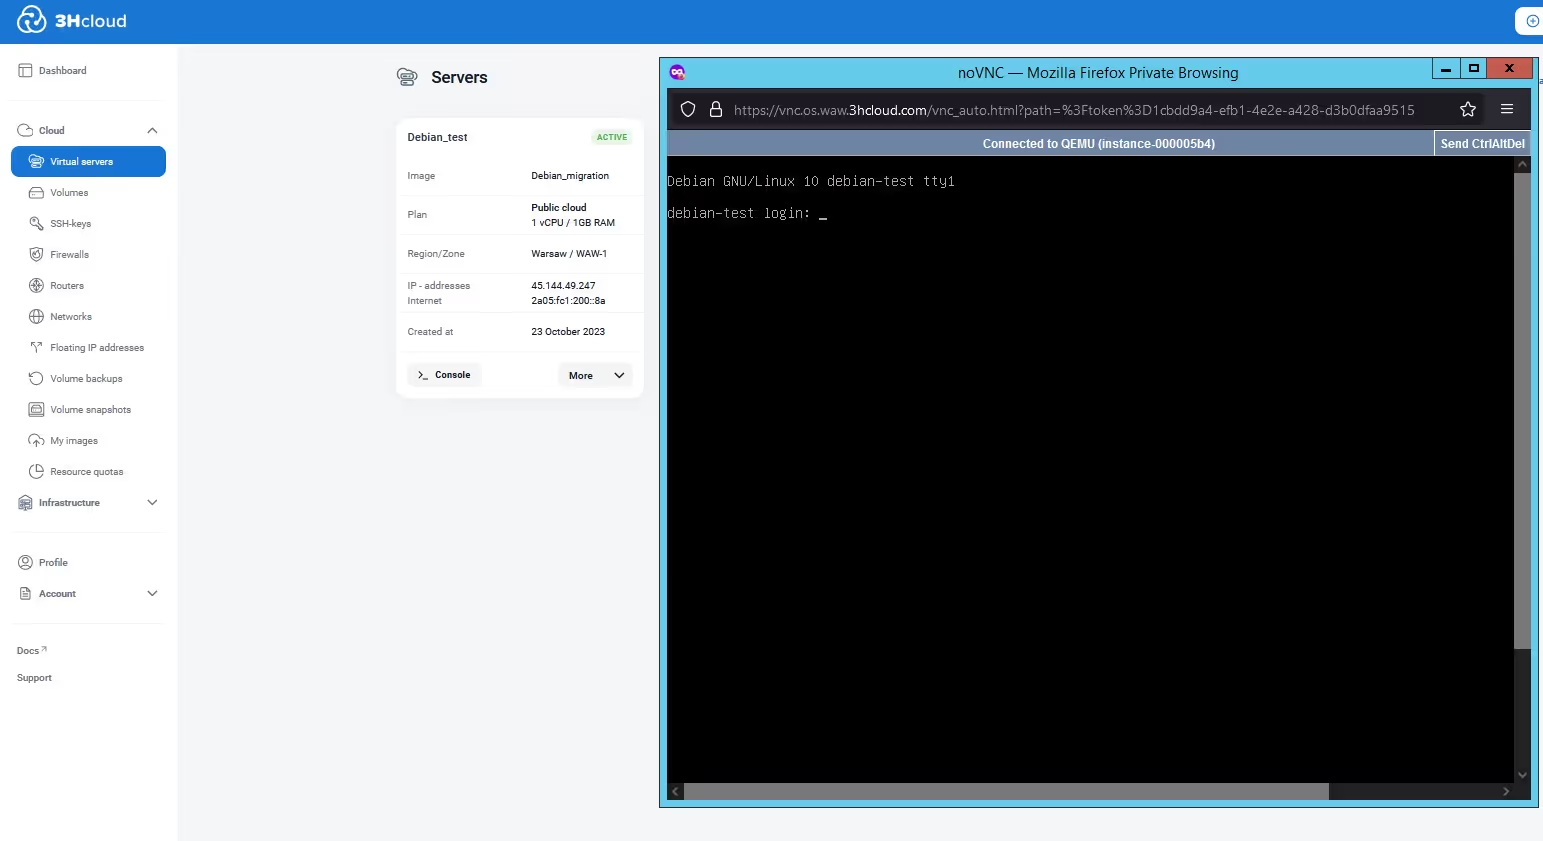
Then, you can log in to the server via the 'Console' button, and if the network was initially configured via DHCP, you can immediately connect to your server via RDP or SSH.
Testing and Verification
It is important to conduct testing and verification to make sure that all virtual machines are working properly in the new 3HCloud environment. If something does not work correctly, you can contact us and we will try to resolve the issue immediately.
Migrating IT infrastructure to the 3HCloud can provide many benefits to an organization. Here are some of them:
- Flexibility and scalability. 3HCloud provides the ability to make the infrastructure wider depending on the needs of the company. You can easily add or remove resources, such as virtual machines, storage, or networks, according to the requirements of your business.
- Resource management. 3HCloud provides a centralized resource management interface that facilitates the control and management of your IT infrastructure. You can automate the deployment and management of virtual machines, resource monitoring, network configuration, and other operations, which reduces administration time.
- The support team. Our technical support team is a group of professionals who are not only deeply versed in the subject area but also help users.
These are just some of the benefits of moving infrastructure to the 3HCloud. However, it is recommended to conduct a detailed analysis of requirements, planning, and testing to make sure that the selected infrastructure meets your needs and goals of the company before making a decision on migration.