Deploying a Proxmox Backup Server Instance in 3HCloud


If you run Proxmox Virtual Environment (PVE), you know about its native solution for backups - Proxmox Backup Server (PBS). Unlike solutions that rely on third-party applications, PBS does not require any agents or additional plugins. Backups are stored as deduplicated chunks, which allows efficient incremental backups and fast restores.
Following the 3-2-1 backup rule, at least one copy of your data should live off-site, ideally in the cloud. The challenge is that deploying PBS means wrestling with cloud platform limitations - no custom ISO support, restricted networking and no low-level storage control.
3HCloud makes this significantly easier. You can prepare a custom RAW image with PBS and scale the storage PBS needs. The result: a working off-site backup target without complex workarounds. In this guide, we’ll walk through the entire deployment process step-by-step.
Step 0. Before you start
Let’s briefly discuss the architecture of the solution. The PVE nodes will send backups over the network to a remote PBS instance hosted in the 3HCloud platform. The PBS instance itself will store backups as chunks inside a datastore, perform garbage collection, maintain indexes, and verify data integrity. The 3HCloud infrastructure acts as the underlying layer, providing PBS with the necessary compute resources and storage capacity.
Although Proxmox doesn’t officially publish a scaling table for PBS based on the number of served nodes, we can provide some practical recommendations based on real-world experience. Below are examples of 3HCloud configurations suitable for different deployment scales.
Minimum run
Configuration s-1gb-1vcpu: shared pool 1 GB 1 vCPU
This configuration allows you to launch a PBS instance in the most minimal setup possible. Even without active tasks, at least a quarter of the available memory will be consumed, and during backup operations memory will quickly become a bottleneck. It is not suitable for performance testing.
Test purposes
These configurations are suitable for testing backup performance and general functionality:
Configuration s-4gb-2vcpu: shared pool 4 GB 2 vCPU
Configuration g-8gb-2vcpu: general purpose 8 GB 2 vCPU
Small Environment (1-3 nodes PVE, max 15 VM/CT)
For PBS to operate comfortably, it typically requires around 4 vCPUs and 4-8 GB of RAM when using ext4 or XFS. If ZFS is used, the memory requirements change. A common rule: you should allocate roughly 1GB of additional RAM for every 1TB of raw disk space:
Configuration c-8gb-4vcpu: cpu-optimized 8 GB 4 vCPU
Configuration g-16gb-4vcpu: general purpose 16 GB 4 vCPU
Disk performance requirements depend on the size of the backups being transferred and the backup schedule. You can start with SSD LITE, and if the available throughput (1,000 IOPS / 100 MiB/s) becomes insufficient, consider upgrading to a faster storage tier.
Medium Environment (3-7 nodes PVE, max 70 VM/CT)
Serving this number of virtual machines requires more CPU resources - typically 8 to 16 vCPUs. This ensures that deduplication mechanisms operate efficiently while maintaining good performance. The amount of RAM depends on the datastore size, but a practical range is 16-64 GB:
Configuration c-16gb-8vcpu: cpu-optimized 16 GB 8 vCPU
Configuration g-32gb-8vcpu: general purpose 32 GB 8 vCPU
Configuration g-64gb-16vcpu: general purpose 64 GB 16 vCPU
Disk tiers should be chosen using the same approach as with smaller environments: start with SSD LITE, monitor IOwait levels, and upgrade to faster storage if disk latency becomes noticeable.
Big Environment (>7 nodes PVE, 100+ VM/CT)
If you are managing a large number of virtual machines and significant amounts of data, CPU frequency and core count become the primary factors. Although most individual PBS tasks run single-threaded, the system supports a high level of parallelism. Multiple simultaneous backup jobs, along with verification, compression, and garbage collection processes, can require substantial compute resources. Therefore, higher CPU frequency and a larger number of cores will significantly improve overall performance.
Configuration c-64gb-32vcpu: cpu-optimized 64 GB 32 vCPU
Configuration g-96gb-24vcpu: general purpose 96 GB 24 vCPU
Configuration g-128gb-32vcpu: general purpose 128 GB 32 vCPU
If you plan to store tens of terabytes of backup data, remember to allocate sufficient RAM to allow the system to perform maintenance tasks efficiently. A practical minimum starting point is 64 GB of RAM. Disk performance also becomes critically important at this scale, so it is advisable to consider storage tiers starting from SSD SMART (5 000 IOPS / 300 MiB/s) or higher.
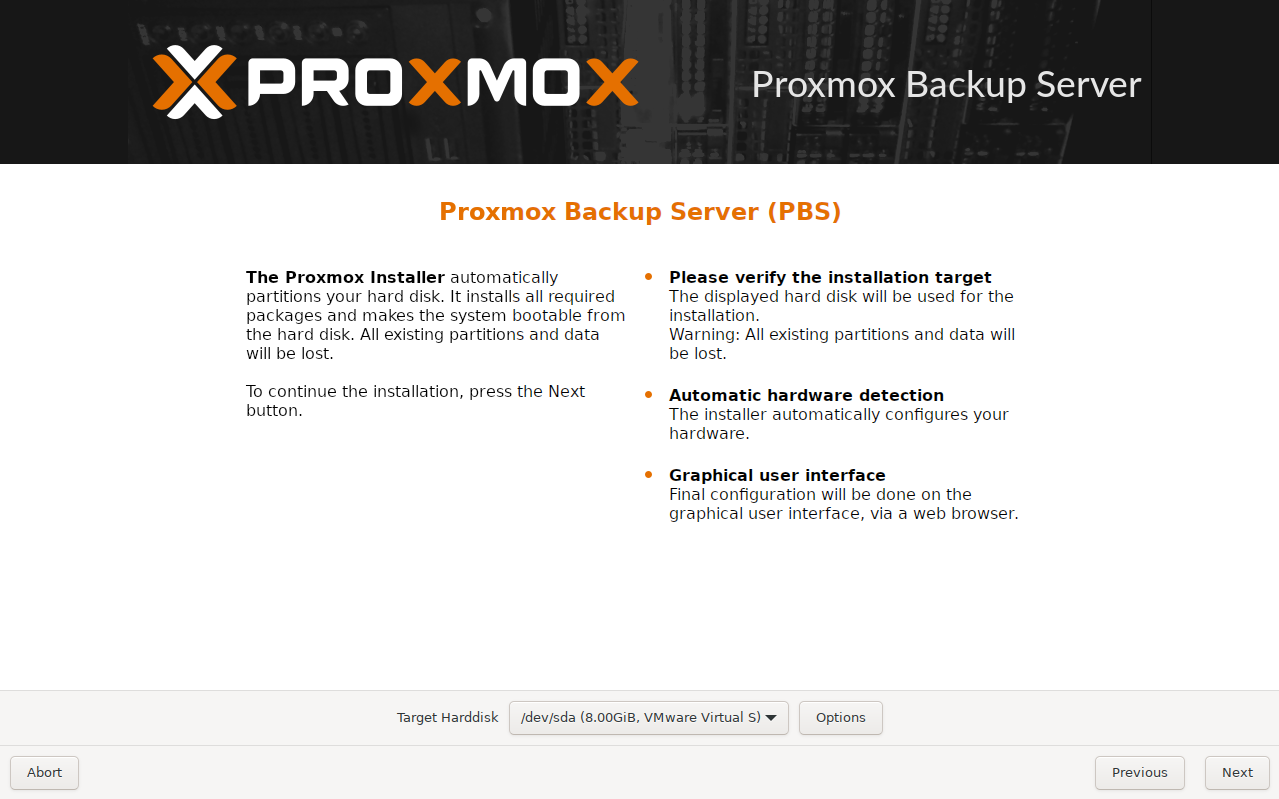
Step 1. Creating a VM and Installing PBS
First, we need a hypervisor. The easiest approach is to install Oracle VirtualBox or VMware Workstation Pro. For our purposes there is no practical difference between them. In this example we will use VMware Workstation 17 Pro and start by creating a virtual machine.
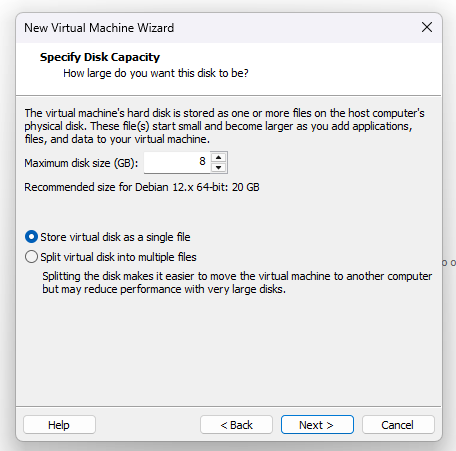
Since PBS is based on the stable version of Debian Linux, I selected the corresponding Debian template. The installer enforces a minimum disk size of 8 GB. Because the disk image will be converted immediately after installation, we choose the option to store it as a single file.
Next, we provide the hypervisor with the path to the Proxmox Backup Server ISO image and proceed with the installation in the standard way.
After the installation is complete and the system has rebooted, shut down the virtual machine completely and convert its disk to RAW format.
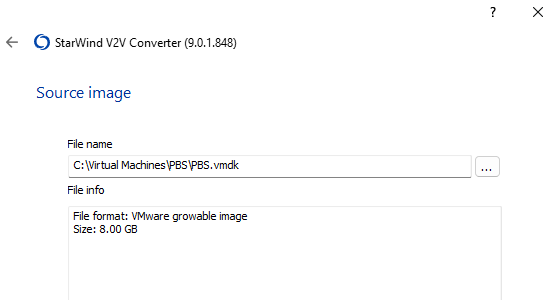
Step 2. Disk image converting
There are several ways to do this, but since the host machine runs Windows, the easiest option is to use the free StarWind V2V Converter. It supports all popular disk image formats and simply performs the task reliably.
First, specify the source disk image.
Next, select the destination location and choose the RAW format for the converted image.
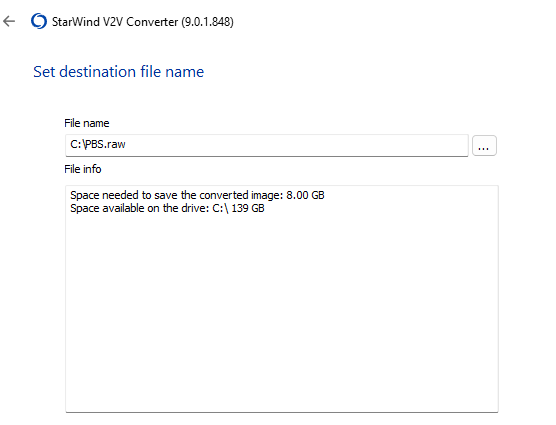
After several dozen seconds, the RAW image will be ready for upload to the 3HCloud platform.
Step 3. Uploading image to 3HCloud
The upload is performed through the web interface of the control panel. Navigate to My Images, click Create, then specify the name of the future image and attach the file using Attach file. Select the required region and click Create image.
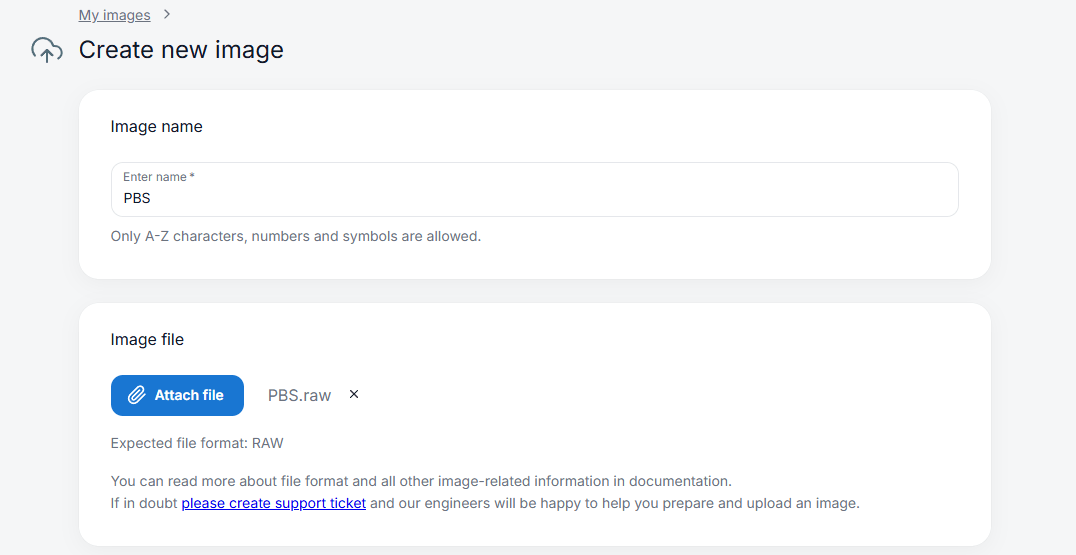
You will then need to wait while the image is uploaded to the cloud. During this process the image is uploaded and distributed across the platform’s storage infrastructure.

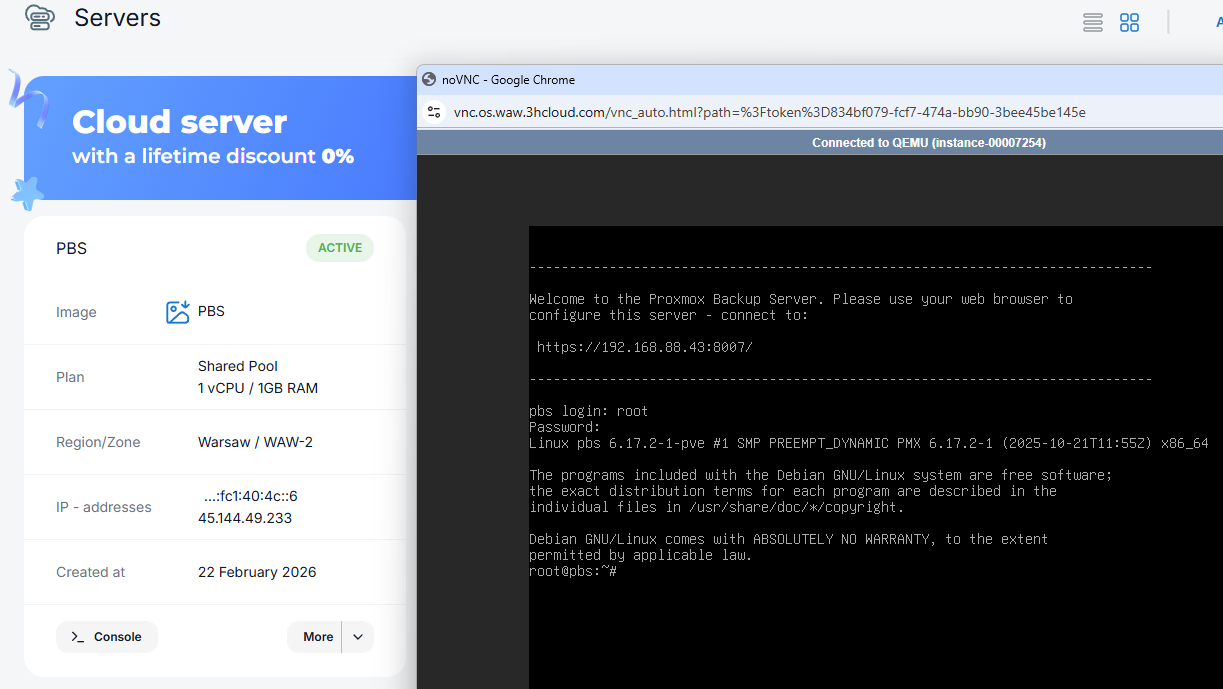
Step 4. Creating cloud VM from the image
Once the process is complete, the new image will appear in the My Images section, and the option to create a virtual machine from it will become available (More - Create server).

After a short time the virtual machine will be created and started. The only potential complication is that the VM will initially contain the network configuration of the environment where it was originally created. For example, it may still have an IP address from a local subnet such as 192.168.88.0/24.
Depending on the virtual NIC model presented by the cloud hypervisor, the interface name may change from the one used in the local hypervisor. Before editing the configuration, verify the actual interface name with ip a. After that open the file /etc/network/interfaces using your preferred text editor and change the address to the one assigned to the cloud VM.
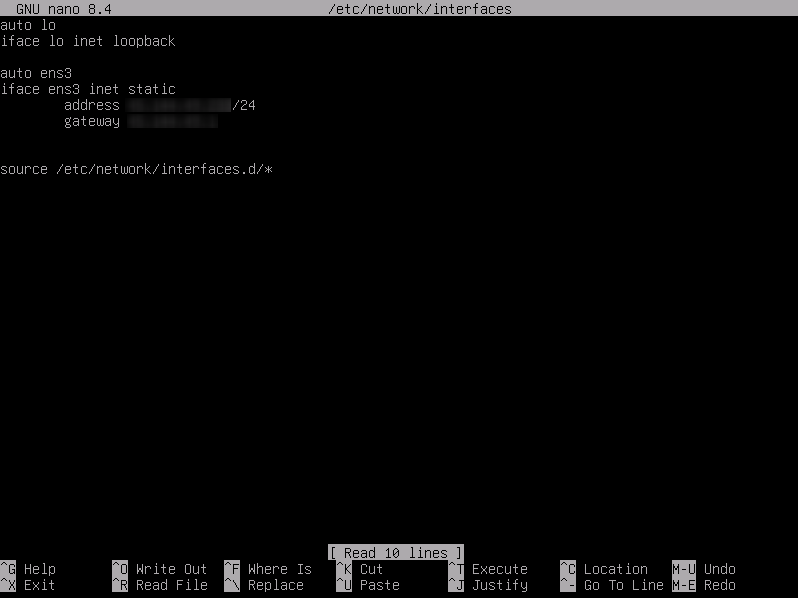
Save the file and reboot the virtual machine. After about half a minute, the PBS web interface will be available at:
https://[IP_ADDRESS]:8007
Step 5. Managing Disk Space
Backups need storage space, and the default 8 GB is clearly insufficient. The minimum disk size for a virtual machine in 3HCloud is 16 GB, which means that we already have 8 GB of unallocated and unused space.
We can confirm this using the command:
root@pbs:~# lsblk
NAME MAJ:MIN RM SIZE RO TYPE MOUNTPOINTS
sda 8:0 0 16G 0 disk
├─sda1 8:1 0 1007K 0 part
├─sda2 8:2 0 512M 0 part
└─sda3 8:3 0 7.5G 0 part
├─pbs-swap 252:0 0 896M 0 lvm [SWAP]
└─pbs-root 252:1 0 6.6G 0 lvm /
The output shows that the total size of /dev/sda is 16 GB, while the pbs-root partition uses only 6.6 GB, with 896 MB allocated for swap. For clarity, we can also check the output of fdisk.
root@pbs:~# fdisk /dev/sda
Disk /dev/sda: 16 GiB, 17179869184 bytes, 33554432 sectors
Disk model: QEMU HARDDISK
Units: sectors of 1 * 512 = 512 bytes
Sector size (logical/physical): 512 bytes / 512 bytes
I/O size (minimum/optimal): 512 bytes / 512 bytes
Disklabel type: gpt
Disk identifier: 2D1F15B1-CF4A-4901-A25D-CCF89C6CA016
Device Start End Sectors Size Type
/dev/sda1 34 2047 2014 1007K BIOS boot
/dev/sda2 2048 1050623 1048576 512M EFI System
/dev/sda3 1050624 16777182 15726559 7.5G Linux LVM
Here we see a typical disk layout with three partitions:
- /dev/sda1 - used for booting on legacy BIOS systems
- /dev/sda2 - required for booting on modern UEFI systems
- /dev/sda3 - allocated entirely for LVM. This is convenient because LVM allows very flexible disk management at a higher level.
Our action plan will be the following:
- Install the cloud-guest-utils package, which includes the useful growpart utility.
- Extend the /dev/sda3 partition.
- Expand the PV (Physical Volume).
- Expand the LV (Logical Volume).
- Resize the filesystem to the maximum available size.
Package installation is no different from standard Debian practice - we use the apt package manager:
root@pbs:~# apt update && apt -y install cloud-guest-utils
Next, we use growpart to expand /dev/sda3 to the maximum available size:
root@pbs:~# growpart /dev/sda 3
At this point you can once again inspect the fdisk output. Now expand the physical volume:
root@pbs:~# pvresize /dev/sda3
Physical volume "/dev/sda3" changed
1 physical volume(s) resized or updated / 0 physical volume(s) not resized
Once the PV has increased in size, the logical volume can be expanded:
root@pbs:~# lvextend -l +100%FREE /dev/pbs/root
Size of logical volume pbs/root changed from <6.62 GiB (1694 extents) to 14.62 GiB (3743 extents).
Logical volume pbs/root successfully resized.
Finally, resize the filesystem of the logical partition /dev/pbs/root:
root@pbs:~# resize2fs /dev/pbs/root
resize2fs 1.47.2 (1-Jan-2025)
Filesystem at /dev/pbs/root is mounted on /; on-line resizing required old_desc_blocks = 1, new_desc_blocks = 2
The filesystem on /dev/pbs/root is now 3832832 (4k) blocks long.
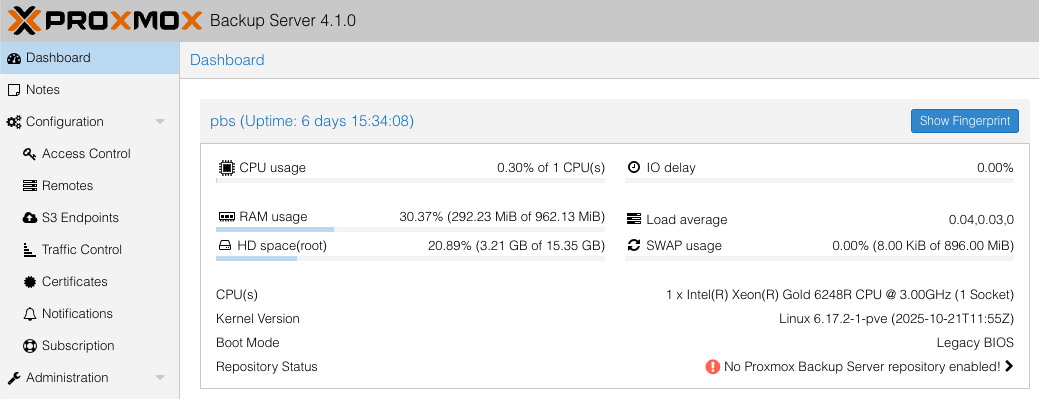
After refreshing the control panel page, we can see that the system now has the full 16 GB of disk space available.
It is also worth noting that extending the root volume is a good option, but not always the only or the best one. It works well for small lab deployments; however, in production environments it is also worth considering separating the operating system from the disk that stores the backup data.
You have successfully deployed a Proxmox Backup Server instance in the 3HCloud platform. This is the starting point for connecting it as a backup target within your Proxmox VE. Now you have a secure off-site backup repository, adding an additional layer of protection against failures. As your infrastructure grows, your cloud backup repository can grow with it, simply by expanding storage when needed.