How to migrate virtual machines between platforms and not lose anything:...


How to Migrate VMs Between Platforms Without Data Loss
When needing to migrate a virtual machine from one site to another, the success rate can fluctuate. Mistakes during the migration process can negatively impact business operations. Therefore, understanding the correct procedure for VM migration is crucial to avoid pitfalls and ensure a smooth transition.
When Might VM Migration Be Necessary?
Virtual machine migration is often required as infrastructure evolves.
Common reasons include:
- Scheduled maintenance operations.
- Infrastructure upgrades or modernization.
- Migrating workloads to a new service provider.
These examples represent only a few of the situations where VM migration may be needed.
How to Prepare for VM Migration
It’s essential to have a plan to avoid problems during virtual machine migration. If you don’t have enough experience, you can use the scheme below.
Planning
Having a detailed plan is crucial. Your plan should encompass:
- The current status of your VM.
- Characteristics of both the current and the intended platforms.
- A clear migration strategy.
- Time allocations for each step and the overall project.
- A contingency plan for unforeseen issues.
The step is rather difficult, but meticulous planning can help preempt potential issues.
Preparing Scripts
Before migrating, ensure that all necessary components are installed and configured as per the requirements. This preparation is needed, specifically, to enable the virtual machine from VMware to operate in OpenStack.
Uploading the System Image
It’s necessary to export the VM image from the current platform. The export options can vary, depending on the platform where the VM is deployed.
Intermediate Conversion
When migrating virtual machines from VMware or other platforms, it's important to export the image in VMDK format. However, this feature isn't available by default everywhere, so an intermediate conversion using third-party tools might be necessary.
Loading
A VMDK image should be uploaded to a new virtual platform.
Launch
The VM should be launched on a new platform. Don’t forget that the IP address will change. This means that before launching, you need to reconfigure the DNS records and switch the load.
If the VM continues to operate on the original platform during the migration, after launching it on the new platform, it's necessary to upload the delta of the data - the information that has accumulated during the migration.
Migration of VMware Virtual Machines to 3HCloud
Let's delve into the migration using the example of transferring VMware to 3HCloud.
Linux Migration Blueprint
1. It’s necessary to check whether the OS kernel supports the VirtIO drivers.
grep -i virtio/boot/config-$(uname -r)Verify if the VirtIO drivers are contained in the temporary file system, either initramfs or initrd.
lsinitrd/boot/initramfs-$ (uname -r).img | grep virtiovirtio
virtio/virtio.ko.xz
virtio/virtio_pci.ko.xz
virtio/virtio_ring.ko.xz
If the initramfs includes the virtio_blk driver along with dependencies such as virtio.ko, virtio_pci.ko, and virtio_ring.ko, then you're set to import custom images into OpenStack.
However, if the initramfs lacks the VirtIO drivers, ensure you restore the temporary file system prior to importing any custom images into OpenStack.
2. Restoring the temporary file system for CentOS or similar Red Hat based distributions.
CentOS/RedHat 5
mkinitrd -f --allow-missing --with=xen-vbd --preload=xen-vbd --with=xen-platform-pci — preload=xen-platform-pci --with=virtio_blk --preload=virtio_blk --with=virtio_pci — preload=virtio_pci --with=virtio_console --preload=virtio_consoleCentOS/RedHat 6/7
mkinitrd -f --allow-missing --with=xen-blkfront --preload=xen-blkfront --with=virtio_blk --preload=virtio_blk --with=virtio_pci --preload=virtio_pci --with=virtio_console — preload=virtio_console /boot/initramfs-$(uname -r).img $(uname -r)3. QEMU Guest Agent and Cloud-init installation.
yum install -y qemu-guest-agent cloud-init && systemctl enable --now qemu-guest-agent4. VMware tools deleting.
/usr/bin/vmware-uninstall-tools.pl5. Stop the VM and export it as a template in OVF packaging format.
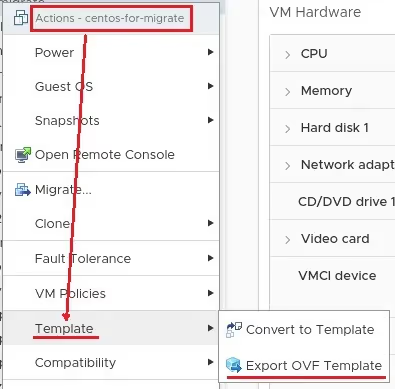
Once the export is finished, download the file in .vmdk format.
6. Copy the VMDK disk to any node with OpenStack CLI or kolla-ansible
7. Converting a VMDK file to RAW.
qemu-img convert -f vmdk -O raw centos-for-migrate.vmdk centos-for-migrate.raw8. You can proceed to manually import the VMDK disk using the openstack-client into the image storage. But if you're uncertain about the process, reach out to 3HCloud technical support - our team will handle the image upload for you.
openstack image create --private --disk-format raw --container-format bare --property hw_qemu_guest_agent=yes --property hw_scsi_model=virtio-scsi --property os_admin_user=root --property os_distro=centos --property hw_scsi_model=virtio-scsi --file centos-for-migrate.raw centos-for-migrate(image name)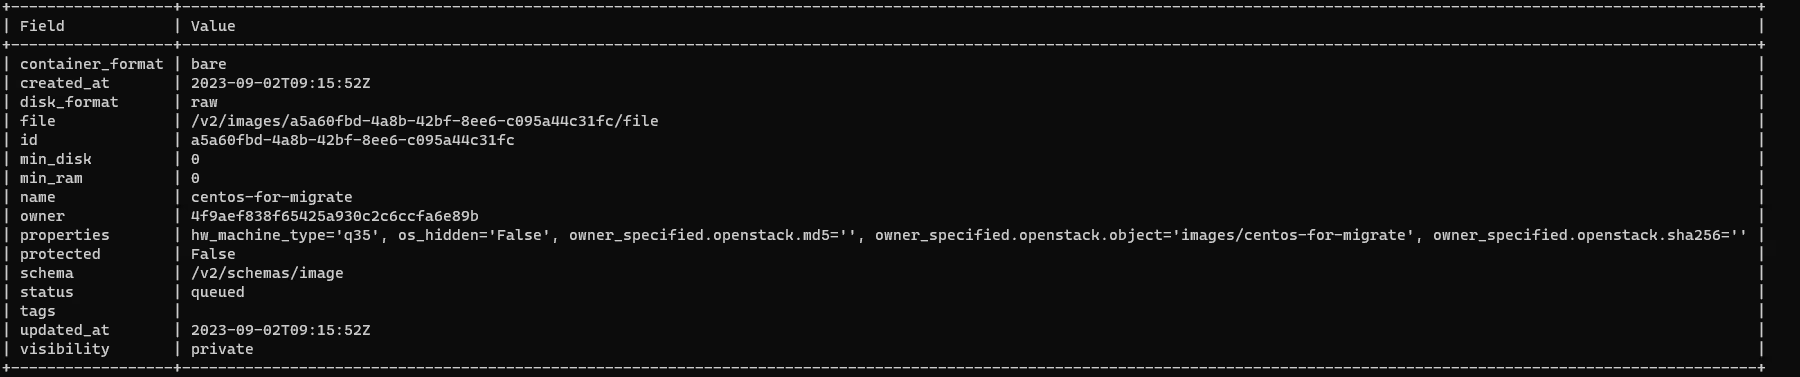
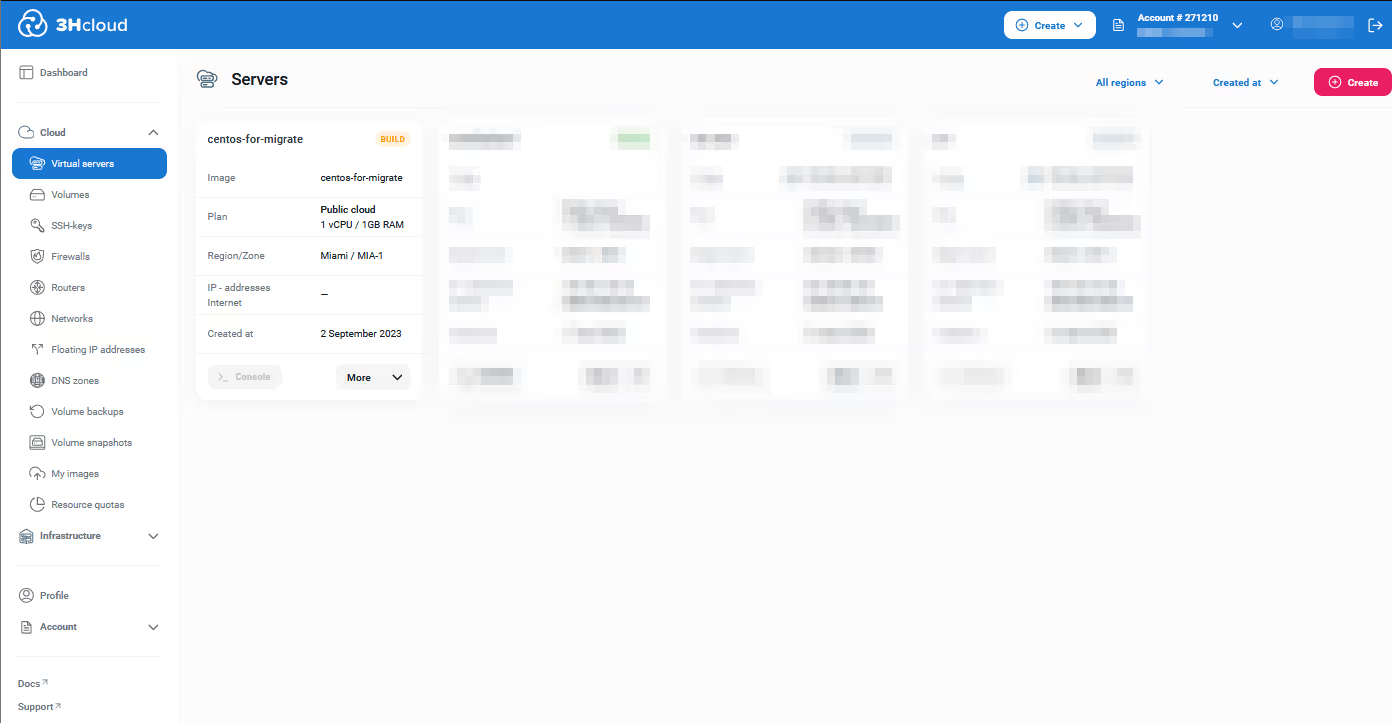
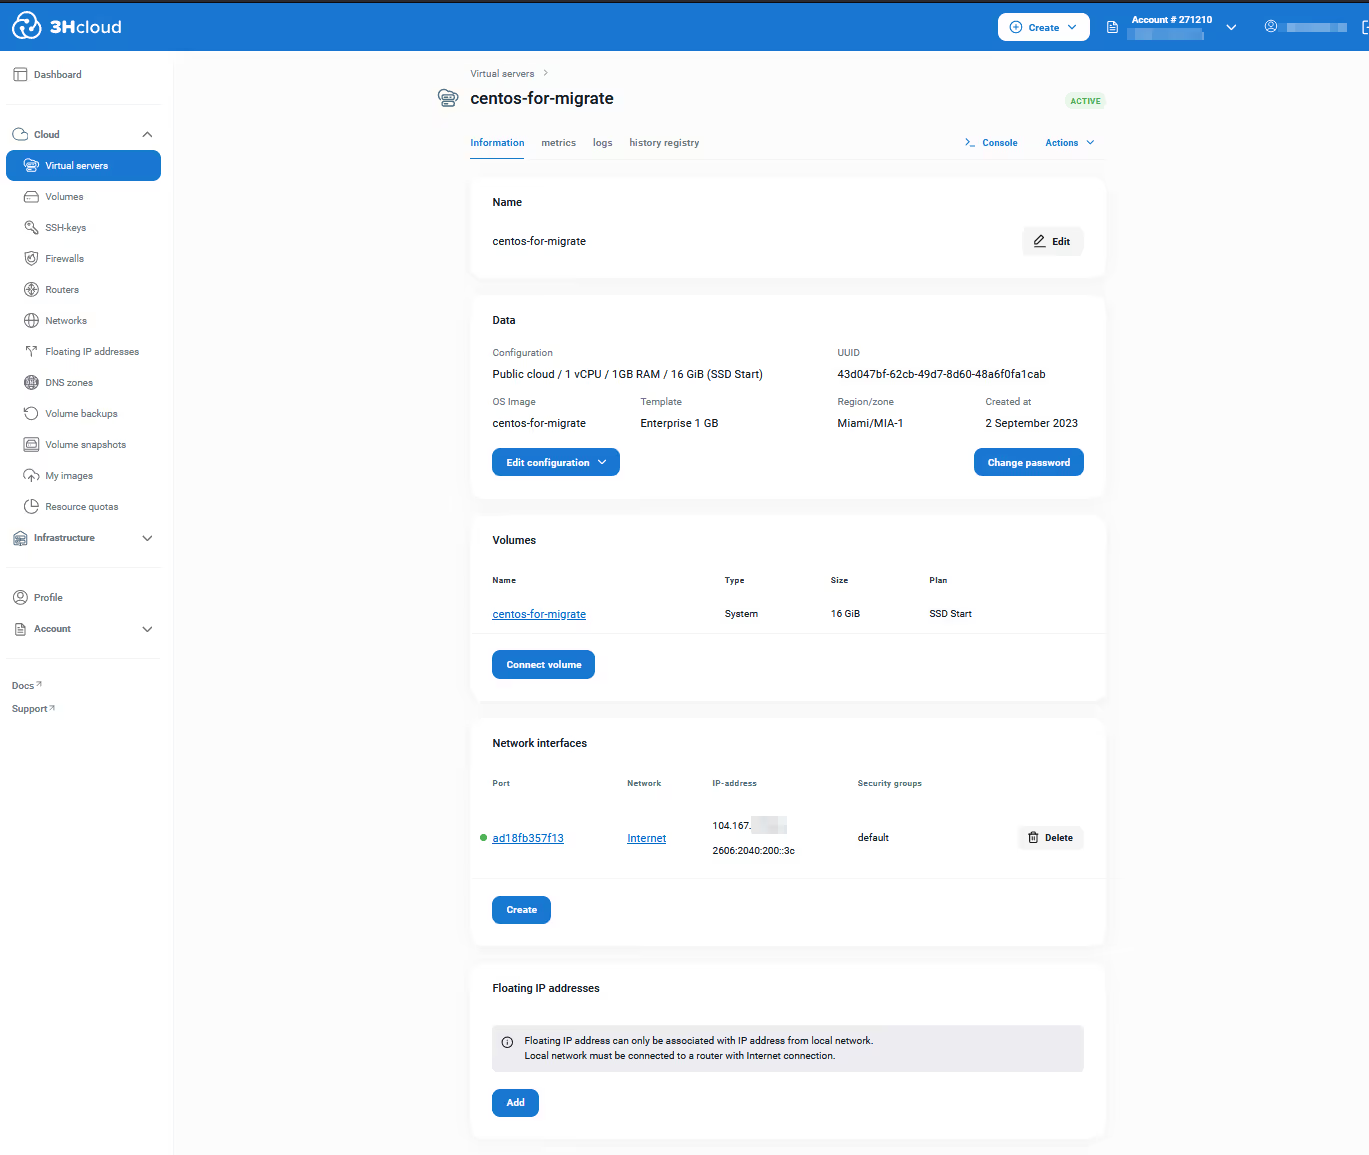
9. Check the image in the Control Panel.
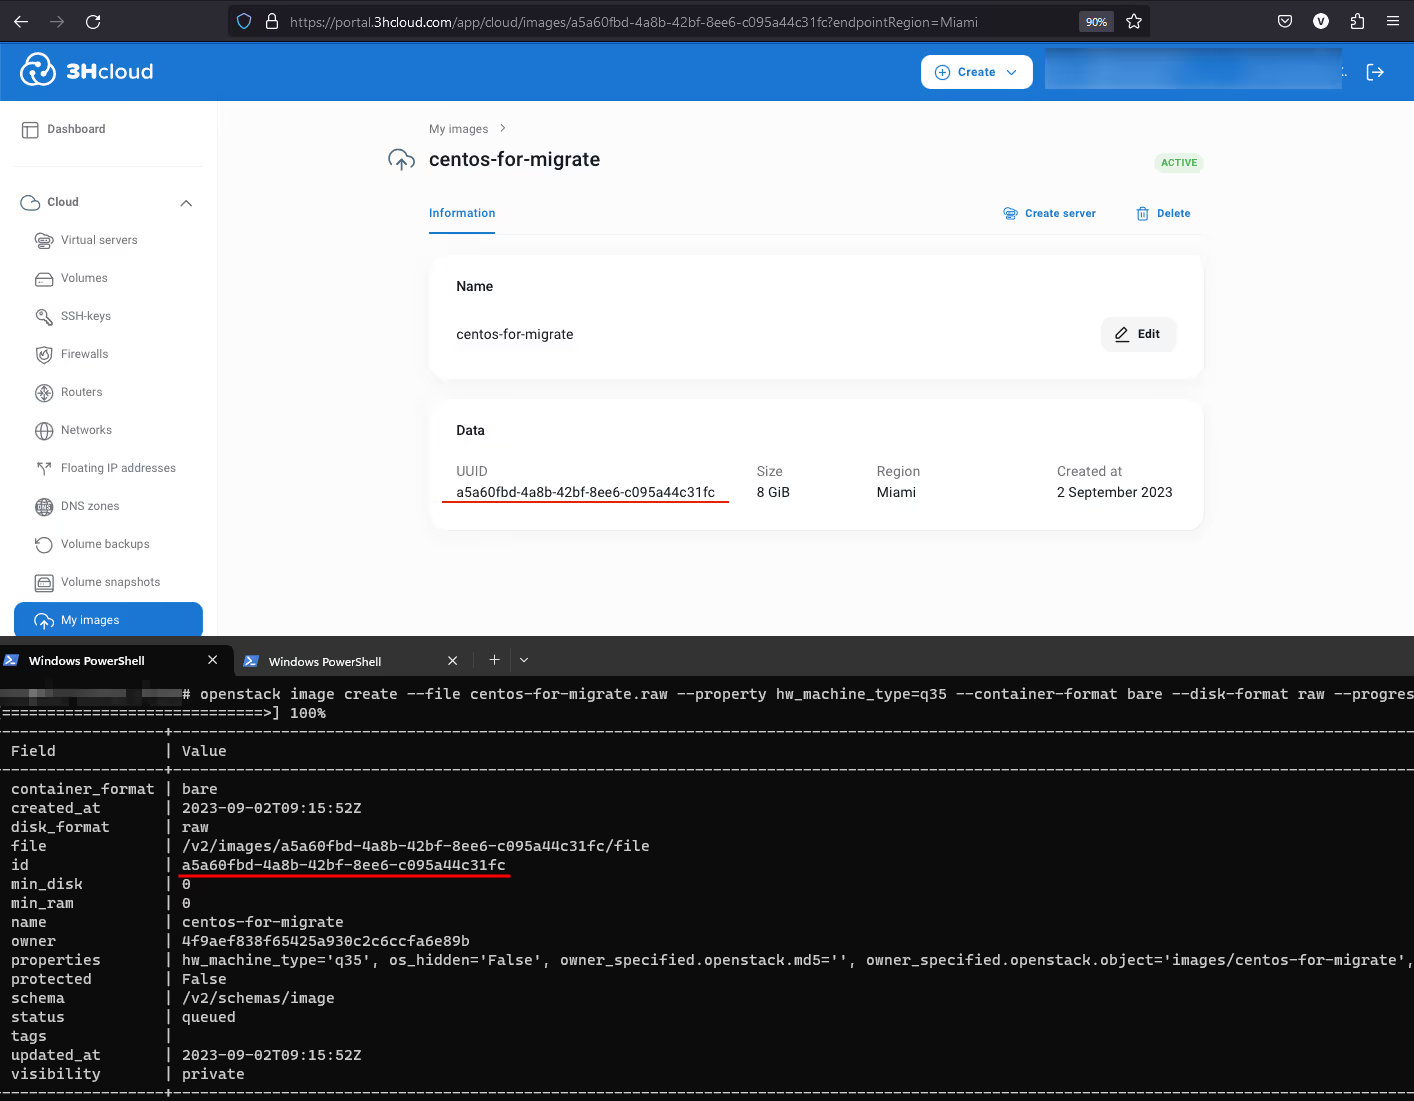
10. Create a VM based on the downloaded image. Ensure the size of system volume is at least as large as that of the original VM.
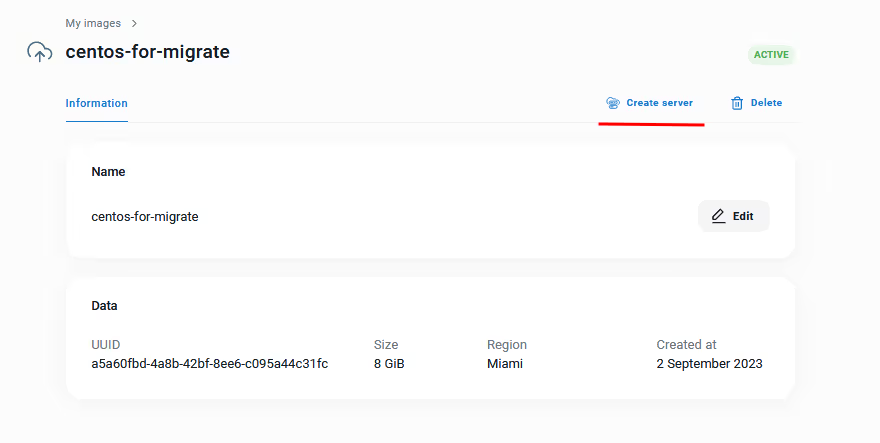
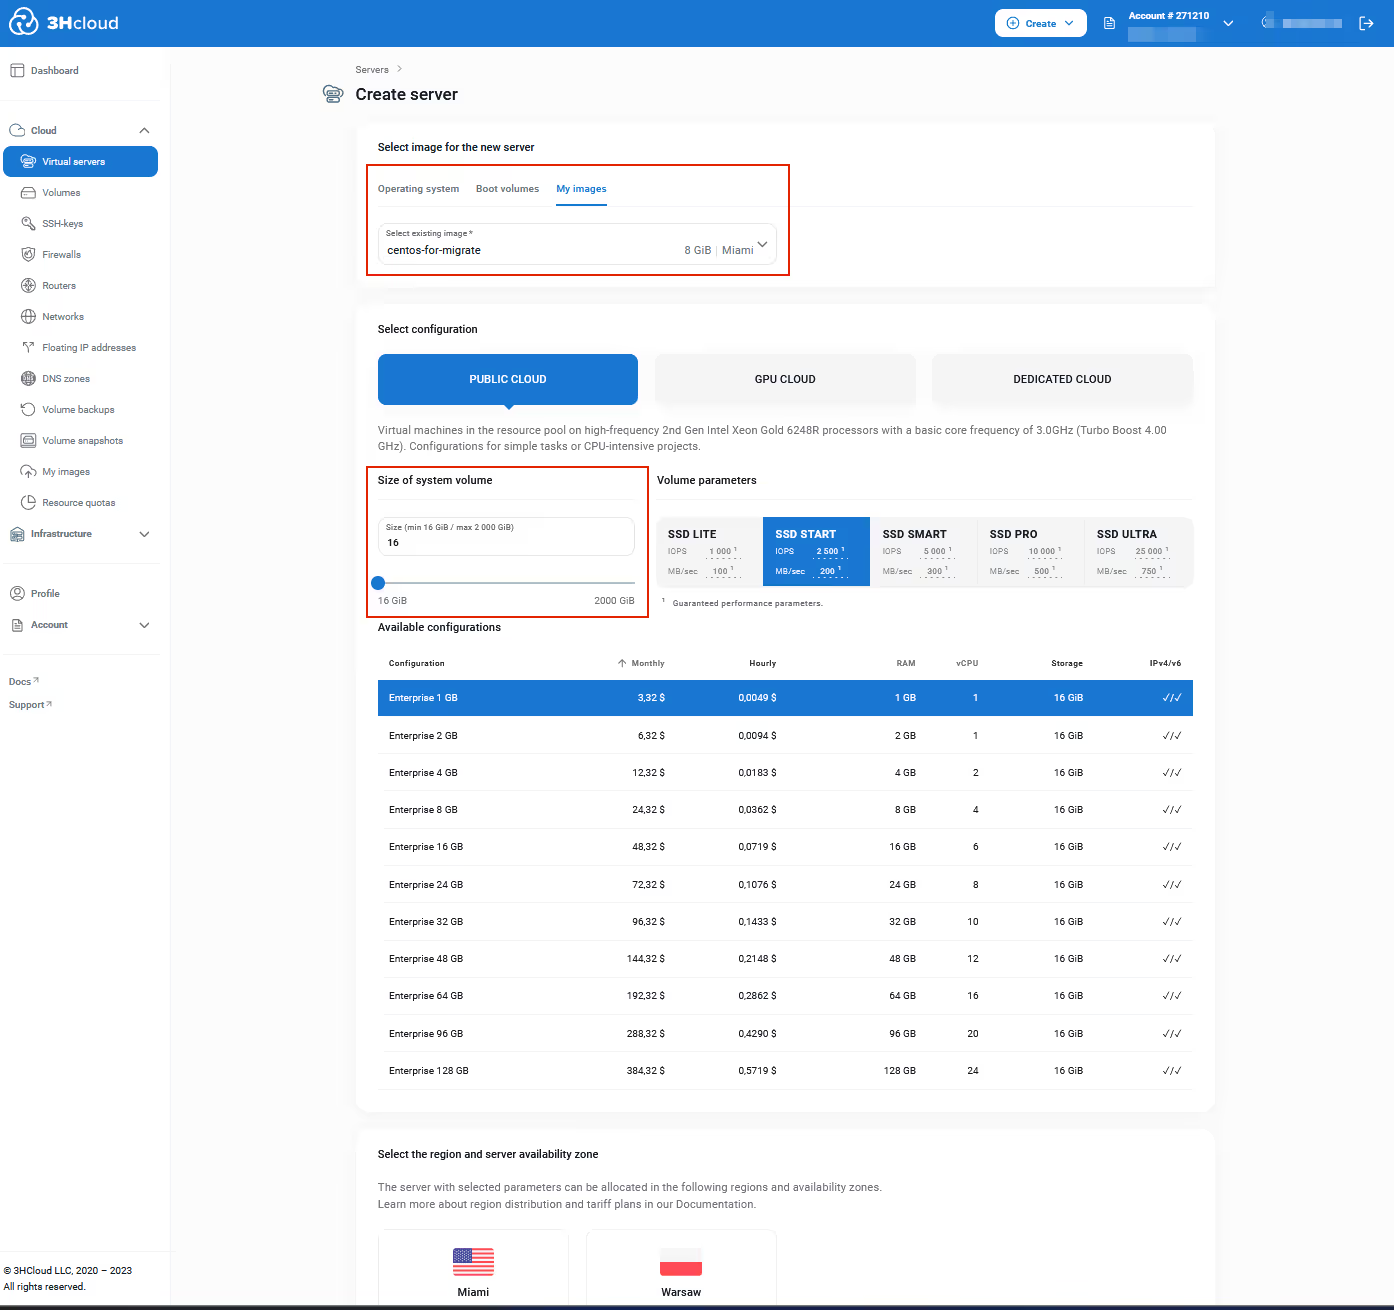
Check that everything is working correctly.

Windows Migration Blueprint
1. Delete VMware tools and install Cloudbase-init.
2. Stop the VM and export it as a template in OVF packaging format.
3. Copy the VMDK disk to any node with OpenStack CLI or kolla-ansible.
4. Convert a VMDK file to RAW.
qemu-img convert -f vmdk -O raw сentos-for-migrate.vmdk centos-for-migrate.raw5. Create an image based on the RAW file.
openstack image create --disk-format raw --filecentos-for-migrate.raw win8-image6. Create a bootable volume.
openstack volume create --image win8-image –sizewin8-volume7. Download the image with VirtIO drivers to the host where the openstack-client is installed.
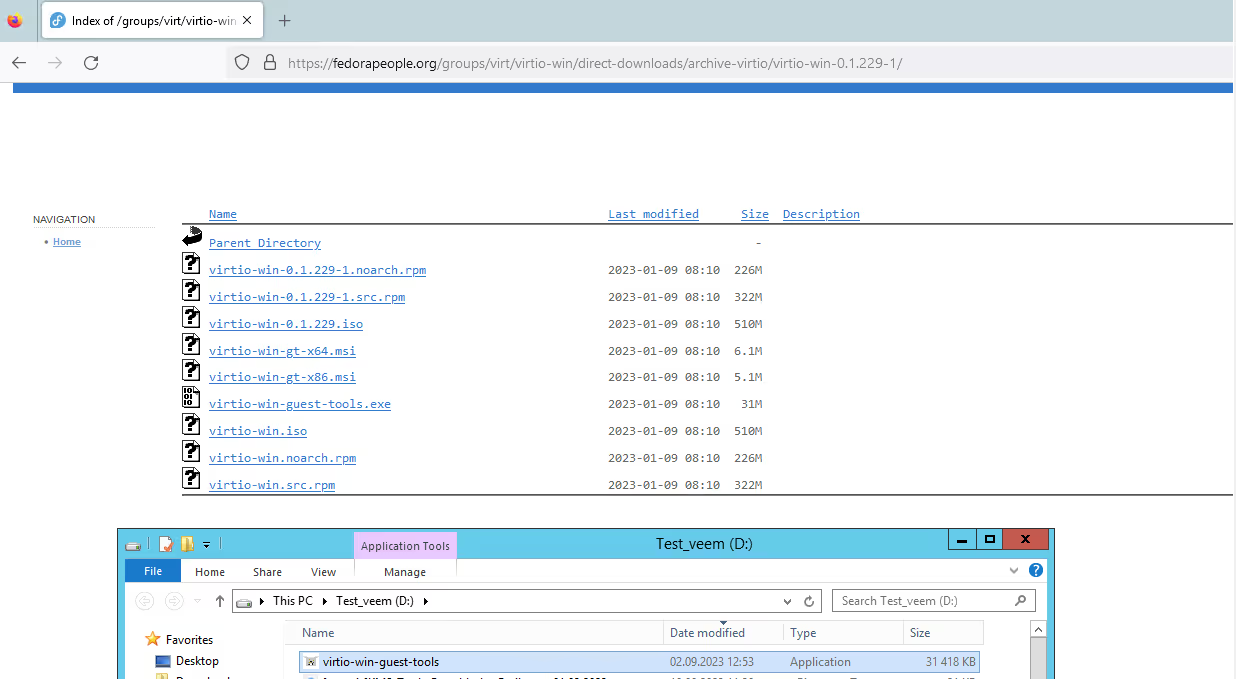
8. Download the VirtIO image from the ISO and create a disk.
openstack image create --private --container-format bare --disk-format iso --file .iso virtio-imgopenstack volume create --image virtio-img –size 1virtio-volume-drivers9. Launch VM where the first CD-ROM device is the ISO file loaded with VirtIO drivers, and the second is the previously created disk from the uploaded Windows image. Execute the following command:
nova boot --flavor Tiny-1-1-10 --nic net-id= --block-deviceid=,source=volume,dest=volume,bus=ide,device=/dev/ vdb,size=1,type=cdrom,bootindex=1 --block-device source=volume,id=,dest=volume,bus=virtio,device=/dev/ vda,size=35,bootindex=0win8-centos-for-migrate10. Use the recovery mode.
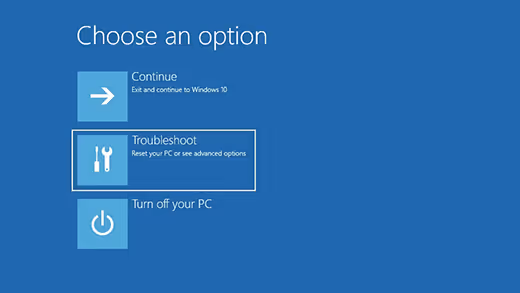
After starting the VM, switch to the console. Windows will try to boot but will be halted by a BSOD (Blue Screen of Death). After a few failed attempts, it will automatically enter recovery mode.
In recovery mode, first select the appropriate keyboard layout. When presented with options, choose "Troubleshoot." From there, open the command prompt. Review the list of available drives. To access the VM's drives, you'll need to temporarily install the virtio driver.
Then install viostor, viorng, and netkvm drivers, press “Continue”.
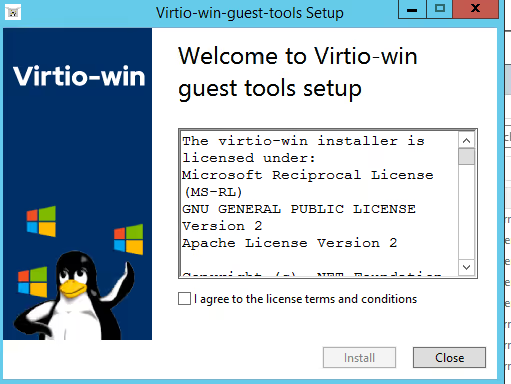
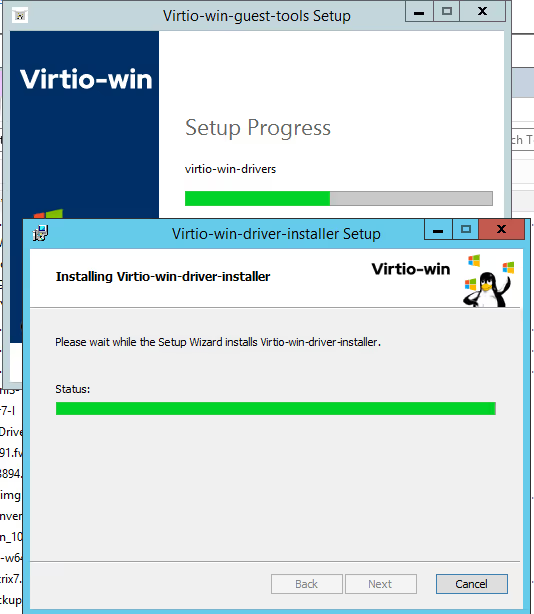
11. Virtio installation.
Switch to the ISO drive with VirtIO and select the installation of virtio-win-gt-x64.
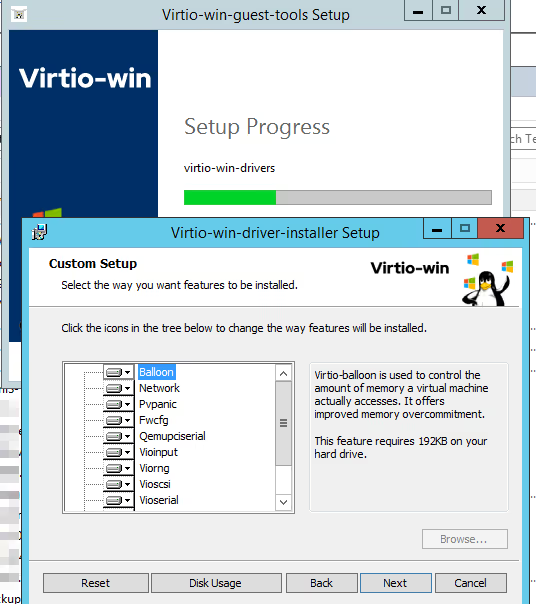
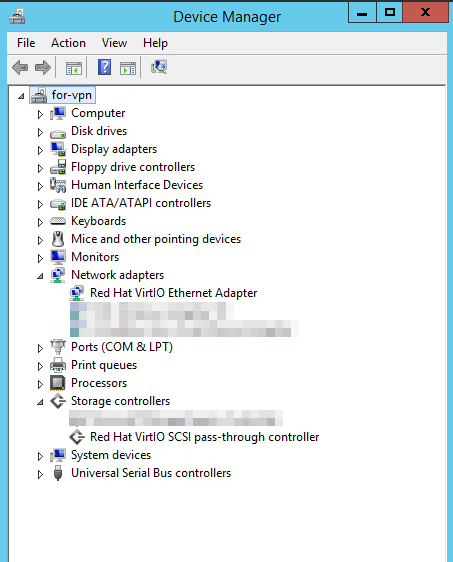
Ensure the disk and network card are operating on the VirtIO driver.
12. Stop VM computing processes and disconnect the ISO disk from the instance.
openstack server stop win8-centos-for-migratenova volume-detach13. Make the main Windows disk clone.
openstack volume create –volumewin8-volumeclone14. Create a public image from a clone.
openstack image create --container-format bare --disk-formatraw –volume win8-volumeclone –public --propertyos_type='windows' --property os_version='8.1' –propertyhw_qemu_guest_agent='true' win8-bios15. Create VM.
Conclusion
Migrating virtual machines between platforms doesn’t have to be risky. With the right preparation and a structured migration process, you can move workloads safely while preserving data integrity and system performance.
If you need expert guidance or infrastructure built for reliable VM operations, the 3HCloud team is always ready to help.